Week 13: Machine Building
- Getting started
- Setting up Flask
- Serial communications
- Templating
- Sending data from the frontend to the backend
- Handling data in the backend
- Adding buttons
- Testing the serial communications
This week our assignment was to:
- Design a machine that includes mechanism, actuation and automation.
- Build the mechanical parts and operate it manually.
- Actuate and automate your machine.
- Document the group project and your individual contribution.
- Include a hero shot and link to machine repository in your documentation.
- Submit a link to your assignment page here.
I was responsible for getting a barebones UI running. I must admit that I'm a bit ashamed by my level of contribution. Thank you for my team for putting up with me and thank you for Yuhan for taking my code and making it work!
Getting started
For the actual UI, I wanted to create a web UI that has a dropdown for selecting the right serial port, as well as arrow buttons for moving the scoop head.
To get started, I watched Kris's lecture on talking to machines with GRBL and Python. I was mostly interested in the code side, instead of the G-code, so that's what I walked away with. The GRBL python example shown in the video definitely proved useful. I also used Flask, which I was already familiar with.
Setting up Flask
To start off, I created a folder for the project, and initialised a virtual environment in it. Python virtual environments make it easy to install dependencies without polluting your machine's global python dependencies.
$ mkdir machine-building
$ cd machine-building
$ python3 -m venv venv
After this, I installed Flask in the virtual environment
$ . venv/bin/activate
$ pip install Flask
Flask was now setup, so I started with a basic hello world -template to verify it works
from flask import Flask

app = Flask(__name__)

@app.route('/')
def index():
    return "OK"
Serial communications
After this, I wanted to get the serial ports listed. From the video, I knew that python doesn't have serial capabilities built in, so I started by installing pyserial
$ pip install pyserial
Turns out that listing serial ports is a bit more involved than I imagined, but not too bad. After a bit of googling, I had the following solution:
import serial
import serial.tools.list_ports
from flask import Flask

app = Flask(__name__)

@app.route('/')
def index():
    for port, desc, _ in sorted(serial.tools.list_ports.comports()):
      print(port)
      print(desc)
    return "OK"
Templating
Now I had to display this list of serial ports in a HTML page. I started by creating a barebones template with a dropdown:
<!DOCTYPE html>
<html lang="en">

<head>
    <title>My Webpage</title>
    <link rel="stylesheet" href="static/css/main.css">
</head>

<body>
    <h1>Scoop UI v0.0.1</h1>
    <div class="container">
        <div class="select-container">
            <label>Select serial port:</label>
            <select class="serial-port">
                <option value="">-- Please select serial port --</option>
                {% for port, desc, _ in serial_ports %}
                <option value="{{ port }}">{{ port}} ({{ desc }})</option>
                {% endfor %}
            </select>
        </div>
</body>

</html>
Next up was rendering this template in Flask. I imported render_template from Flask and replaced the the index function with the following:
@app.route('/')
def index():
    ports = sorted(serial.tools.list_ports.comports())
    return render_template('index.html', serial_ports=ports)
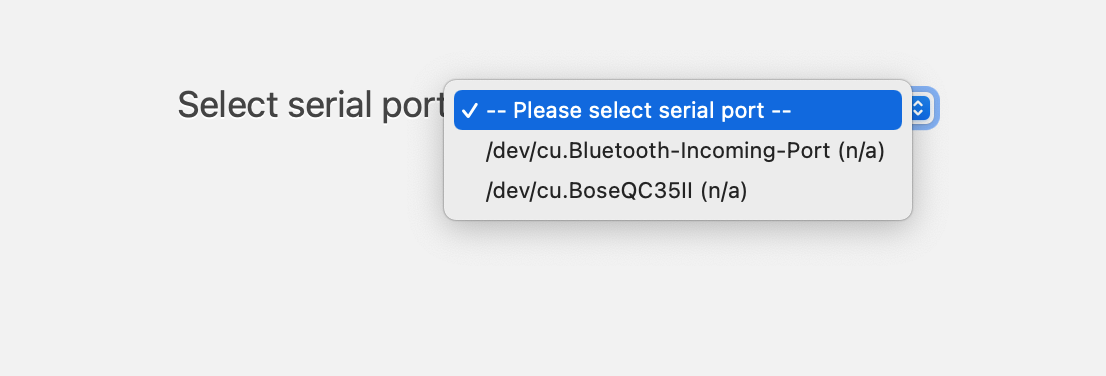
Now I had a dropdown that displayed all my serial ports:
Sending data from the frontend to the backend
Next up was adding some javascript magic to actually make the dropdown do anything. I started by adding an endpoint to Flask for the port changing requests:
@app.route('/serial-port', methods=['POST'])
def change_port():
  print("Jee")
  return "OK"
Next up I created a javascript file that would send a request each time the state of the select element changes:
function send_port(event) {
  const data = JSON.stringify({ serialPort: event.target.value })
  fetch('/serial-port', {
      headers: {
          'Content-Type': 'application/json',
      },
      method: 'POST',
      body: data,
  })
      .then((data) => {
          if (!data.ok) {
              // this will happen if there is a 404 or other error from the API
              throw data;
          }

          const result = document.querySelector('.result');
          result.setAttribute("style", "color:green;")
          result.textContent = 'Ready to output ✅'
          return
      })
      // catch network issues
      .catch(async (error) => {
          const data = await error.json()

          const result = document.querySelector('.result');
          result.setAttribute("style", "color:red;")
          result.textContent = `🆘 ${data.message} 🆘`
      });
}

const selectElement = document.querySelector('.serial-port');
selectElement.addEventListener('change', send_port)
I included this file in the template, and sure enough, it worked:

Handling data in the backend
Next up was doing something with the data sent by the form to the backend. This required parsing POST methods, which luckily is pretty easy in Flask. For the serial parts, I followed the code examples provided by GRBL, and in the end I had the following:
import serial
import serial.tools.list_ports
import time
from flask import Flask, render_template, request, jsonify

app = Flask(__name__)

serial_port = None

@app.route('/serial-port', methods=['POST'])
def change_port():
    global serial_port
    try:
        serial_port = serial.Serial(request.json['serialPort'], 115200)
    except serial.SerialException as e:
        return jsonify({'message': str(e)}), 500

    serial_port.write('\r\n\r\n'.encode())
    time.sleep(2)
    serial_port.flushInput()

return "OK"
Adding buttons
Next up was adding the buttons for moving, so that I could test that the serial connection was actually working. I started by adding endpoints for the move actions:
@app.route('/move-left', methods=['GET'])
def move_left():
    serial_port.write('Moved left\n'.encode())

    return "OK"

@app.route('/move-right', methods=['GET'])
def move_right():

    serial_port.write('Moved right\n'.encode())

    return "OK"
After this I added the buttons to the template:
<div class="buttons">
  <button class="left" type="button">⬅️</button>
  <button class="right" type="button">➡️</button>
</div>
Similarly to the dropdown, I added event listeners for the buttons that would send a request to the backend:
function move_left() {
    fetch('/move-left')
    .then((data) => {
        if (!data.ok) {
            // this will happen if there is a 404 or other error from the API
            throw data;
        }

    })
    // catch network issues
    .catch(async (error) => {
        const data = await error.json()

    });
}

function move_right() {
    fetch('/move-right')
    .then((data) => {
        if (!data.ok) {
            // this will happen if there is a 404 or other error from the API
            throw data;
        }

    })
    // catch network issues
    .catch(async (error) => {
        const data = await error.json()

    });
}

const moveLeftButtonElement = document.querySelector('.buttons .left');
moveLeftButtonElement.onclick = move_left
const moveRightButtonElement = document.querySelector('.buttons .right');
moveRightButtonElement.onclick = move_right
Testing the serial communications
To test this, I plugged in my Arduino Uno that had a program that just echoes whatever is passed to it via serial. First I opened the Serial Monitor in Arduino IDE and tried to establish a connection via the web UI I created. I was greeted with an error:
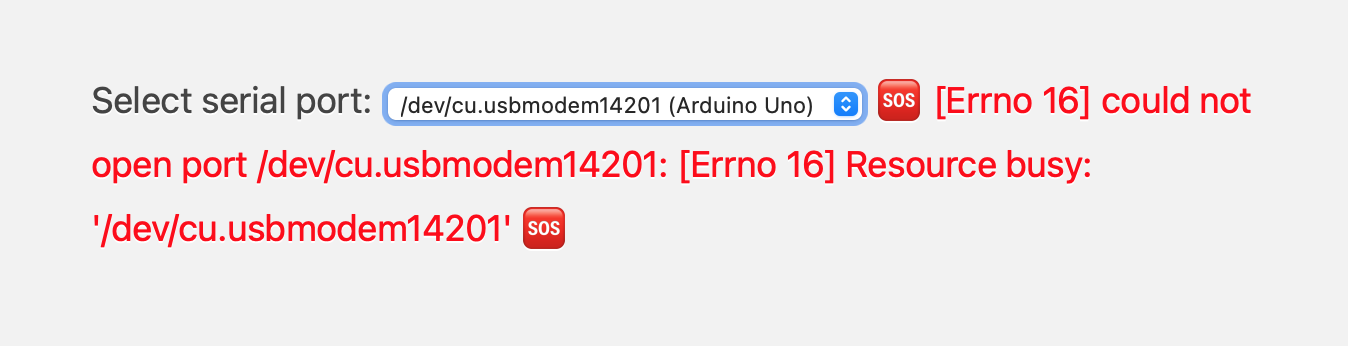
Great! Error handling is was working. I closed the Serial Monitor, refreshed the page, and tried again. This time I was greeted with a green success message:

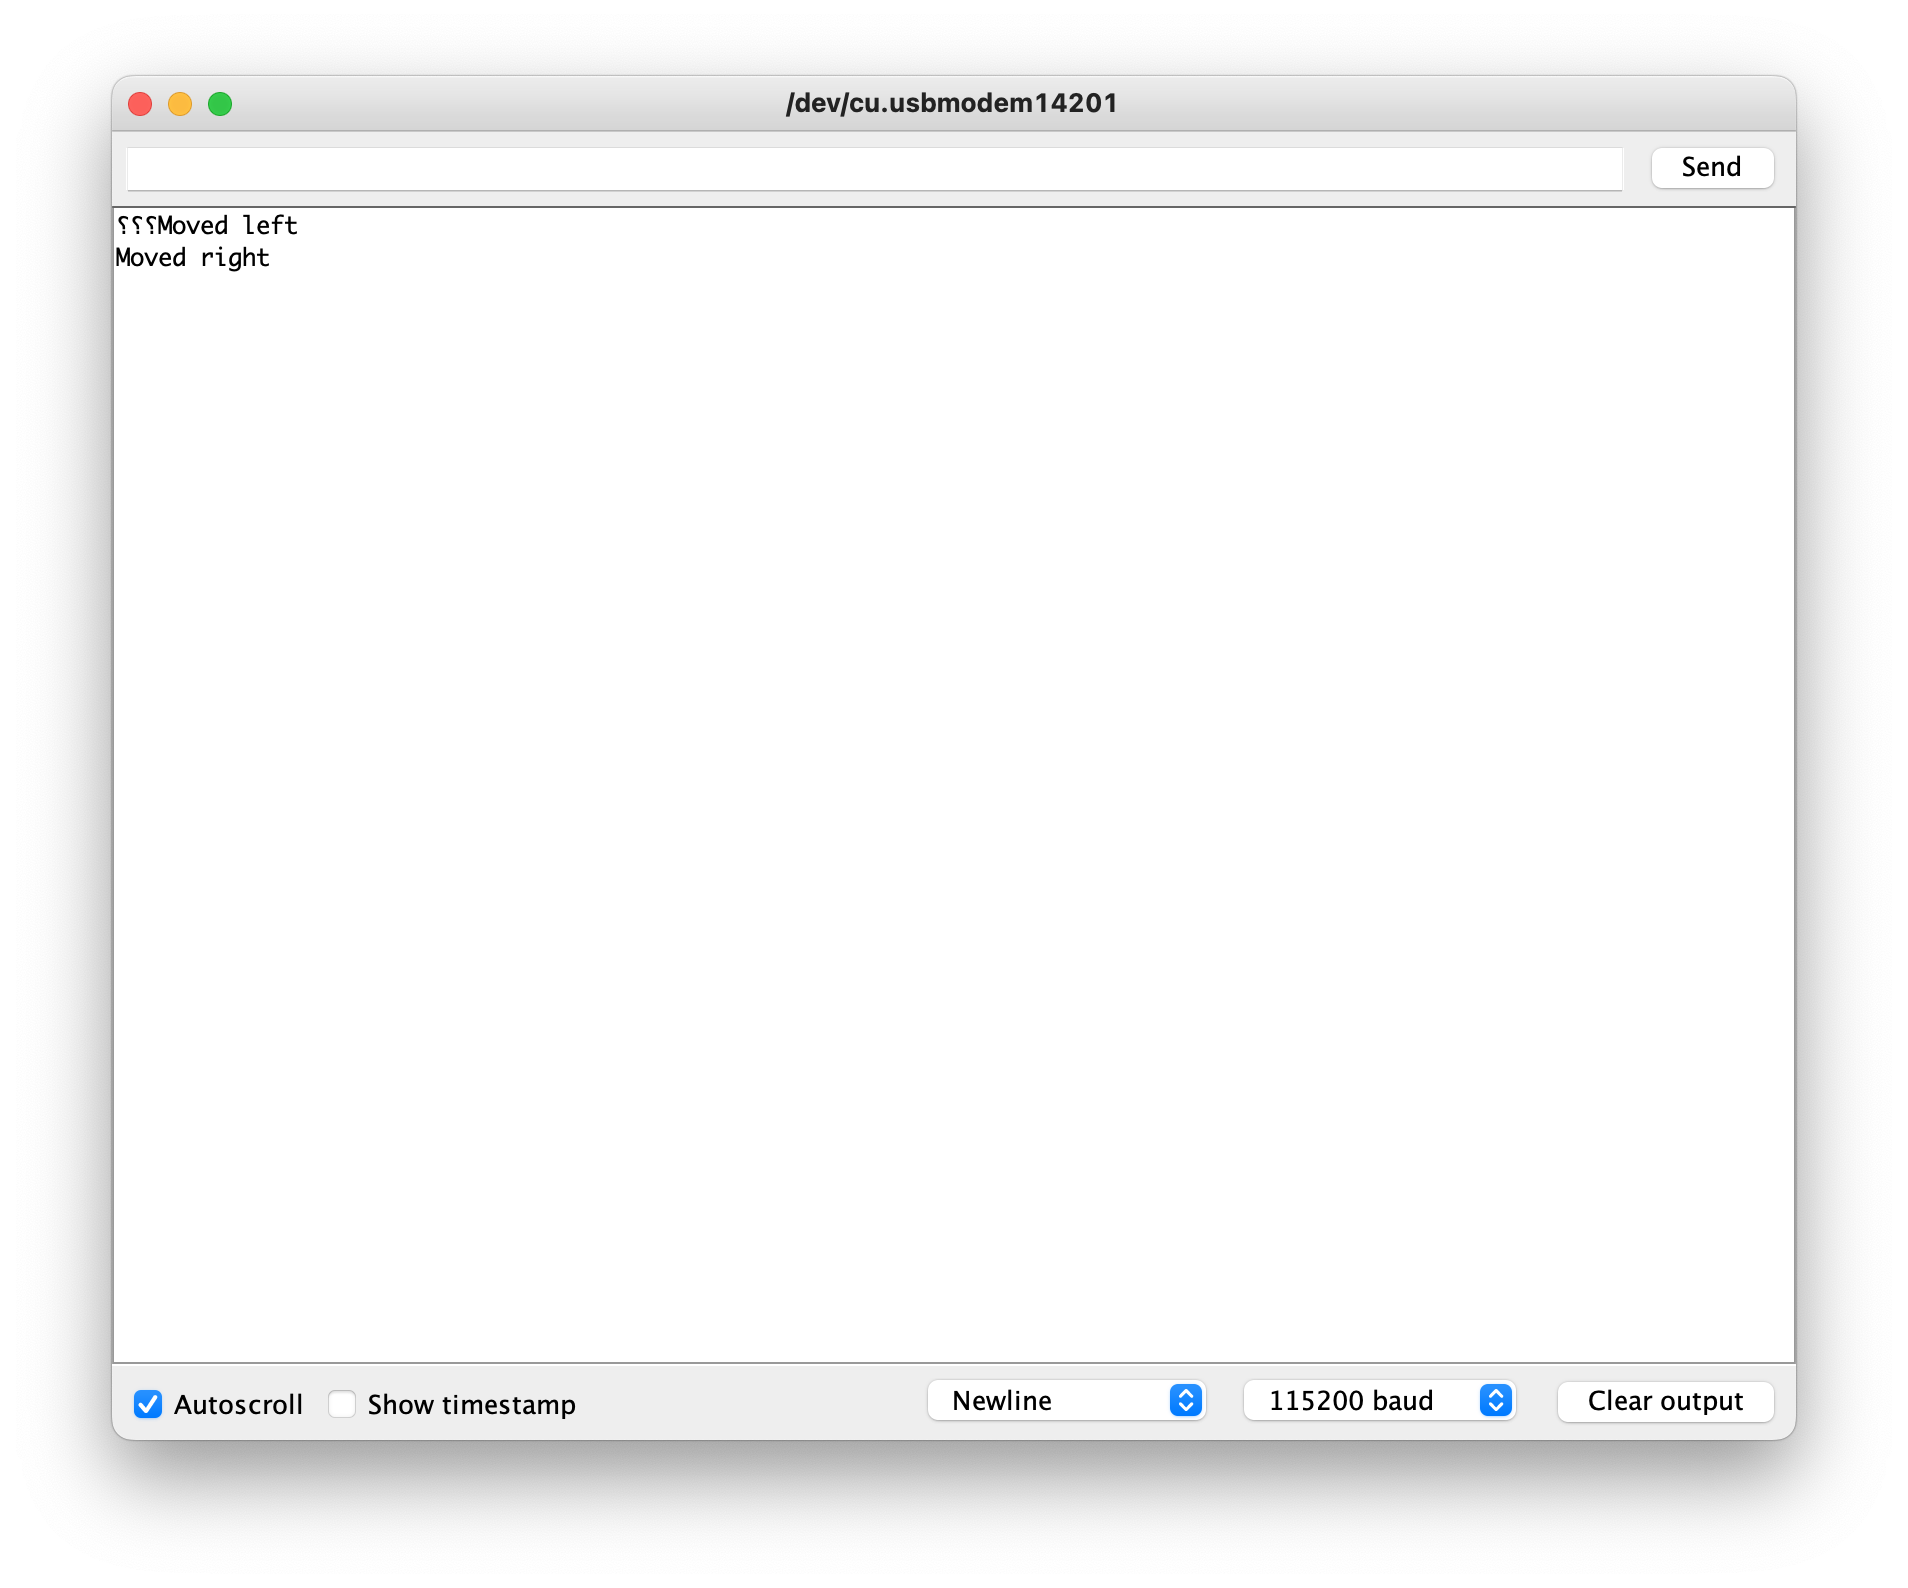
Now it was time to test the buttons. I opened Serial Monitor to see if the data actually went to the Arduino and pressed some buttons back and forth. Lo and behold, I was seeing what I was supposed to be seeing:
Now all that was pretty much left was to pack the dependencies to a requirements.txt file and write a README so that my teammates could easily get the web UI running on their machines. To freeze your dependencies to a requirements.txt, simply run
$ pip freeze > requirements.txt
This produces a file with the following contents:
click==8.1.2
Flask==2.1.1
importlib-metadata==4.11.3
itsdangerous==2.1.2
Jinja2==3.1.1
MarkupSafe==2.1.1
pyserial==3.5
Werkzeug==2.1.1
zipp==3.8.0
Now dependencies can be easily installed in the virtual environment by running
$ pip install -r requirements.txt
This way people don't have to figure out manually what is actually required to run your webapp.
With that my job was done. I pushed my work into our GitLab and called it a day. It was really nice seeing the prototype get better and better with each iteration, I was really glad to be a part of this.
See you next time!