Week 11: Molding and Casting
This week our assignment was to:
- Review the safety data sheets for at least two of labs molding and casting materials.
- Make and compare test casts with each of them.
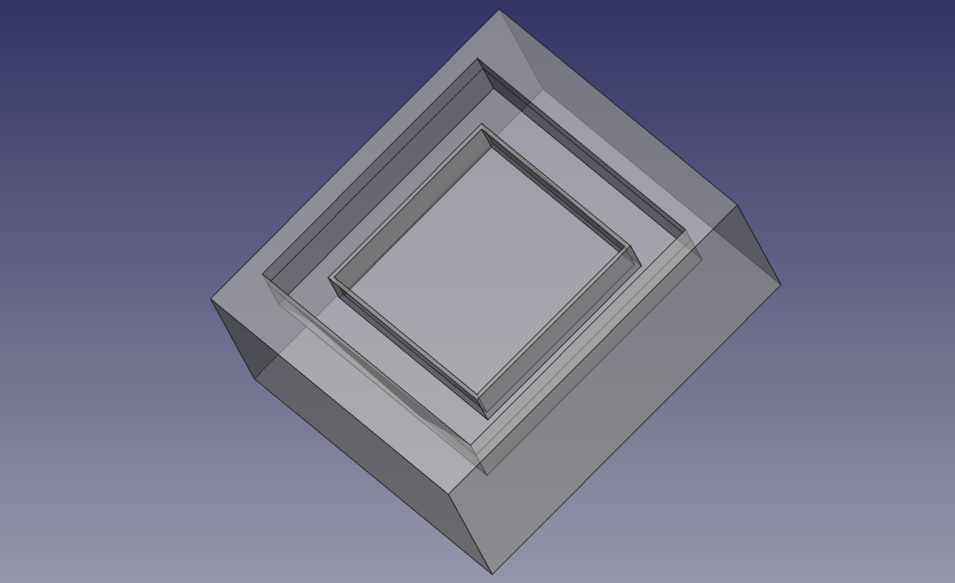
- Design a 3D mold around the stock and tooling that you'll be using.
- Mill it (rough cut + (at least) three-axis finish cut).
- Use it to cast parts.
- Include a hero shot and source files of your design in your documentation.
- Submit a link to your assignment page here.
Unfortunately, this week I haven't had much time to spend with the assignment, so it's still work in progress.
Design
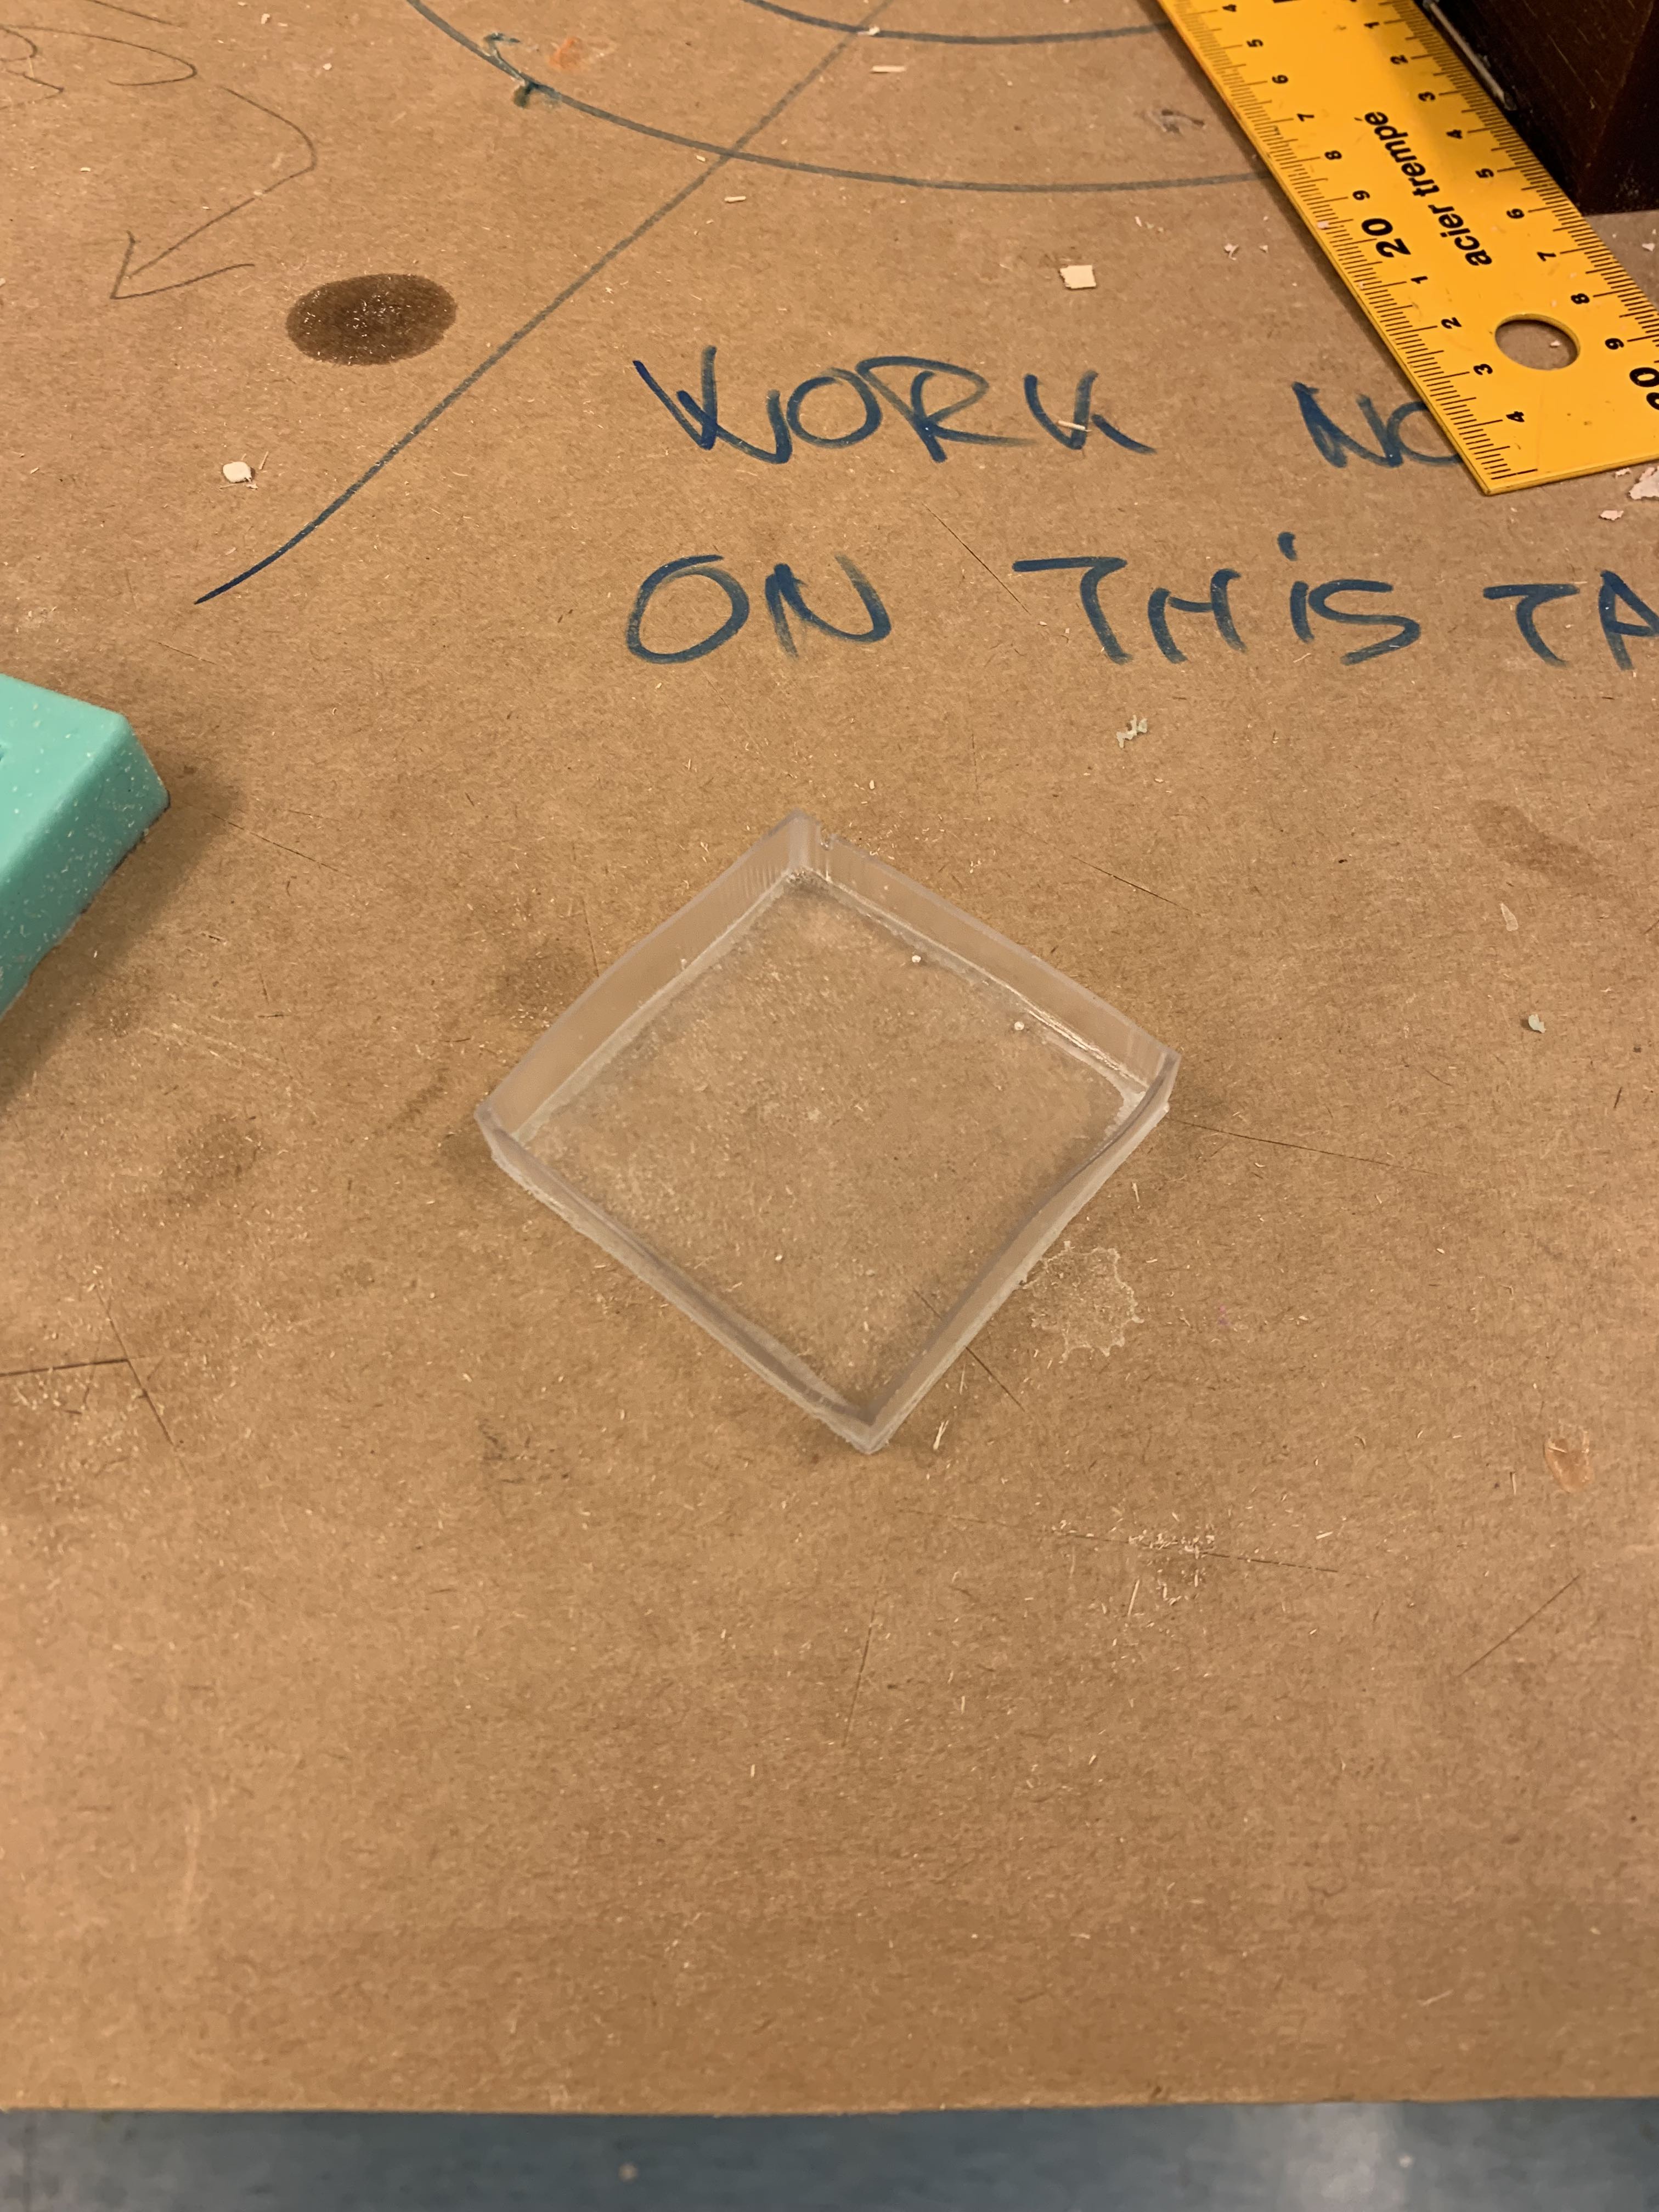
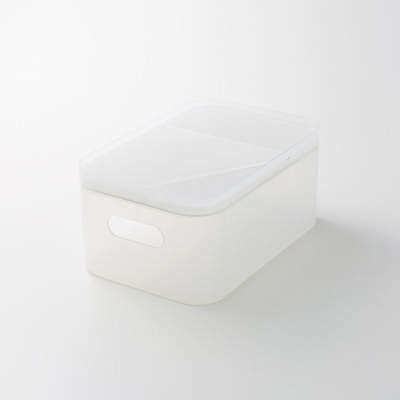
Due to time constraints, I opted to go for a very simple design, a small tray for small objects that I might have lying around the house. You can never have enough trays, right?
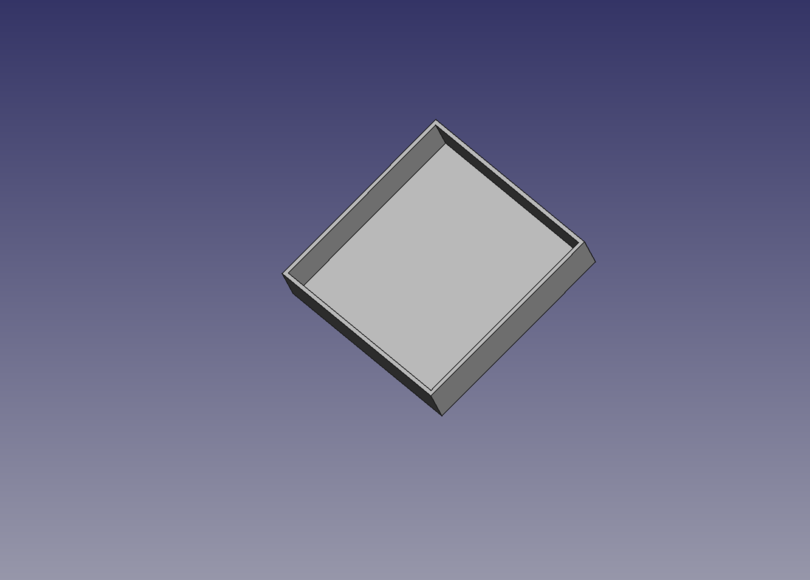
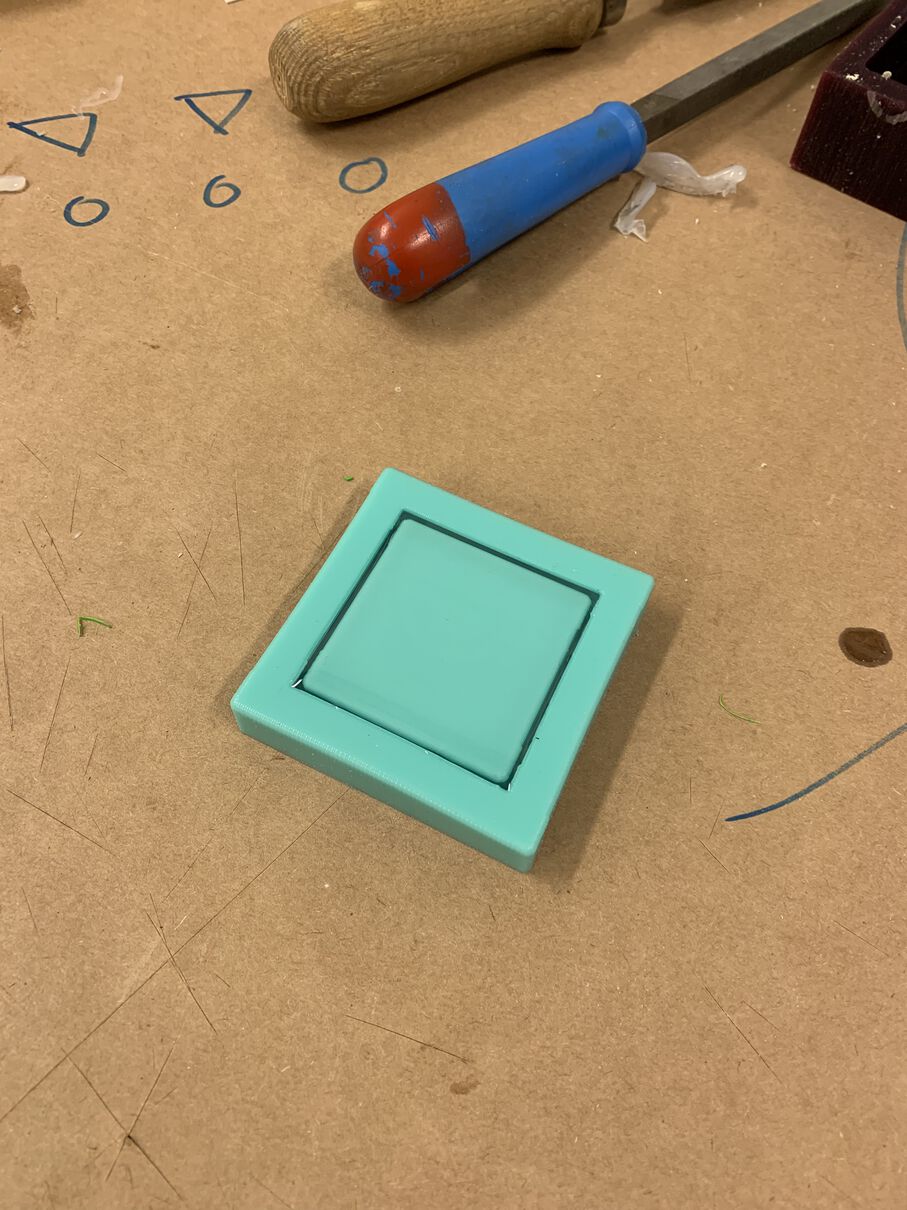
The final mold:
As for the end result, I was thinking of casting it out of clear resin (? can't remember if it was resin) and then sanding it down to a milky finish, similar to this:
Milling the mold
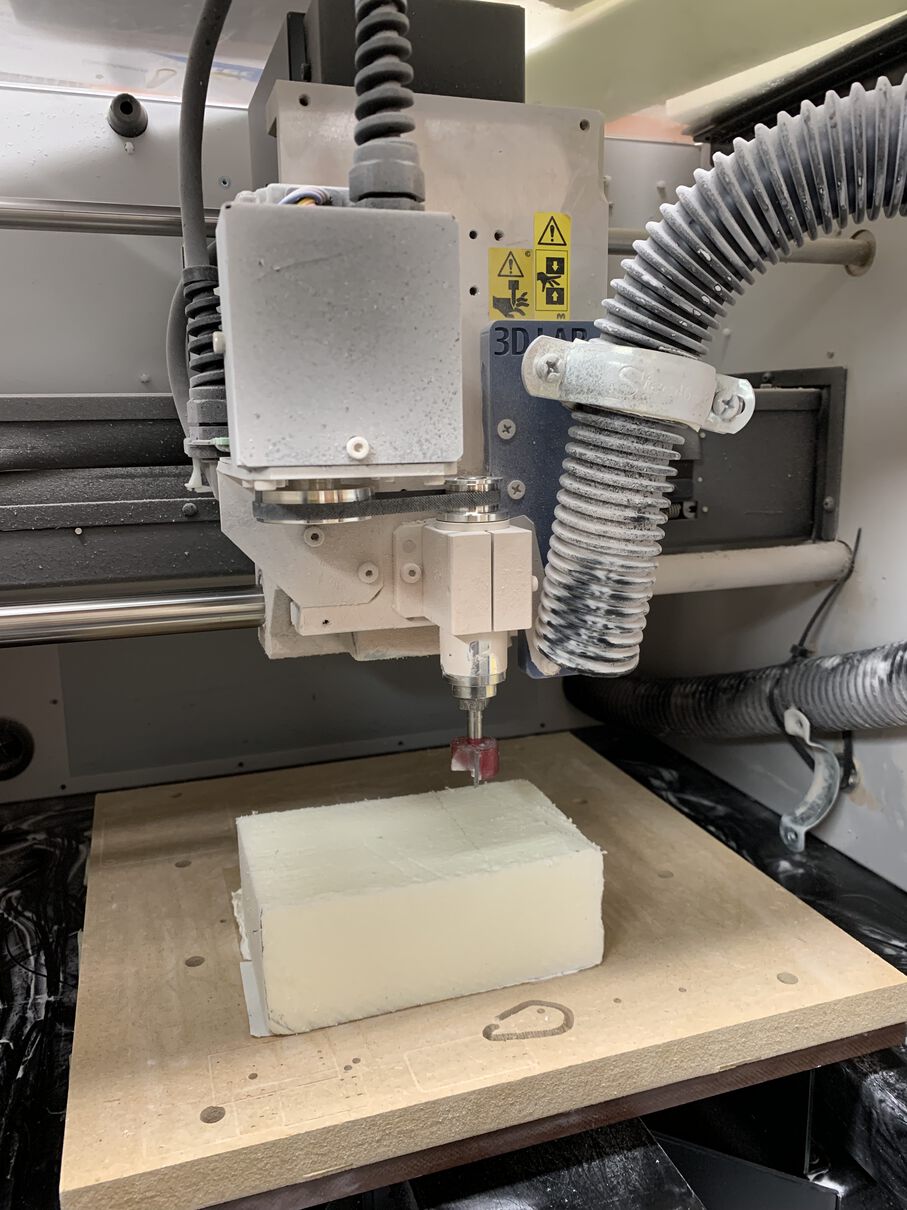
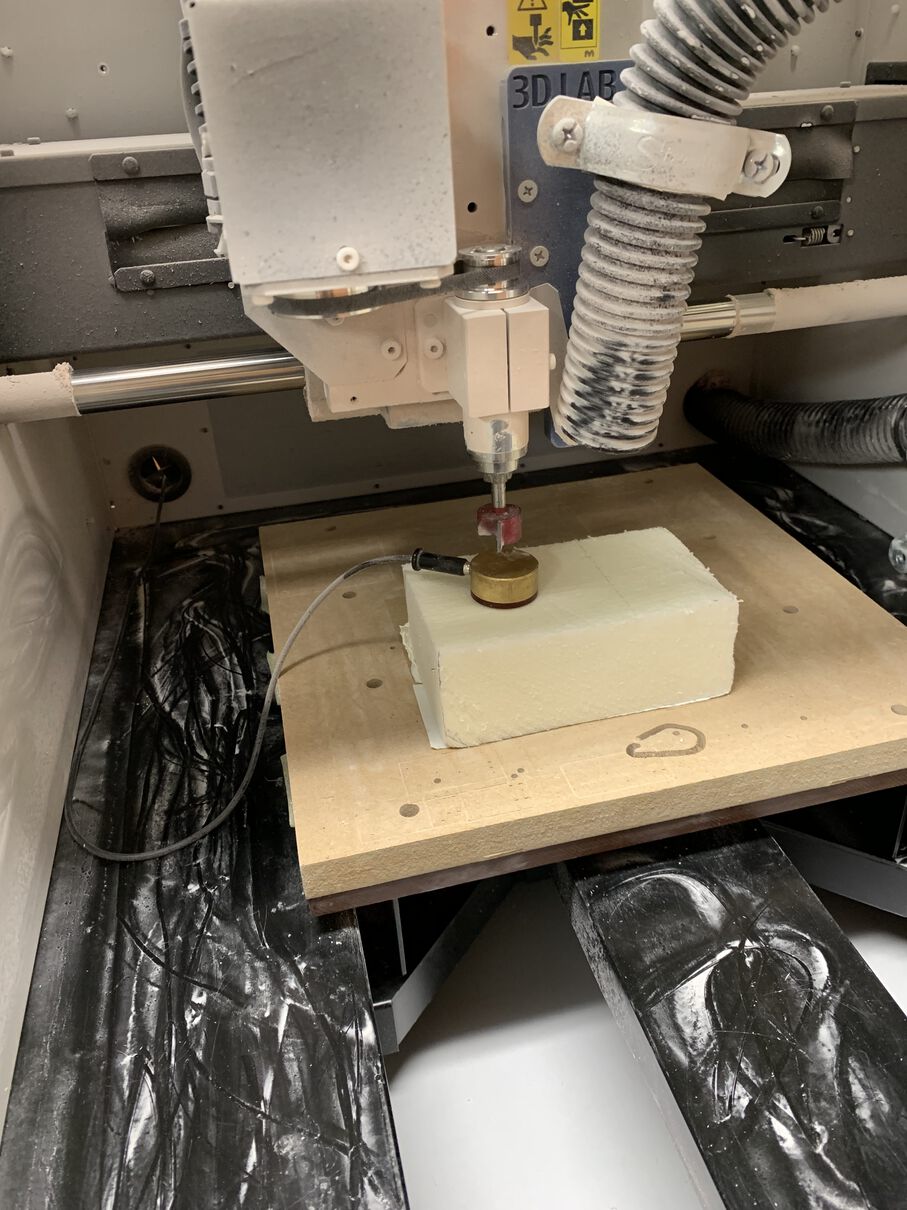
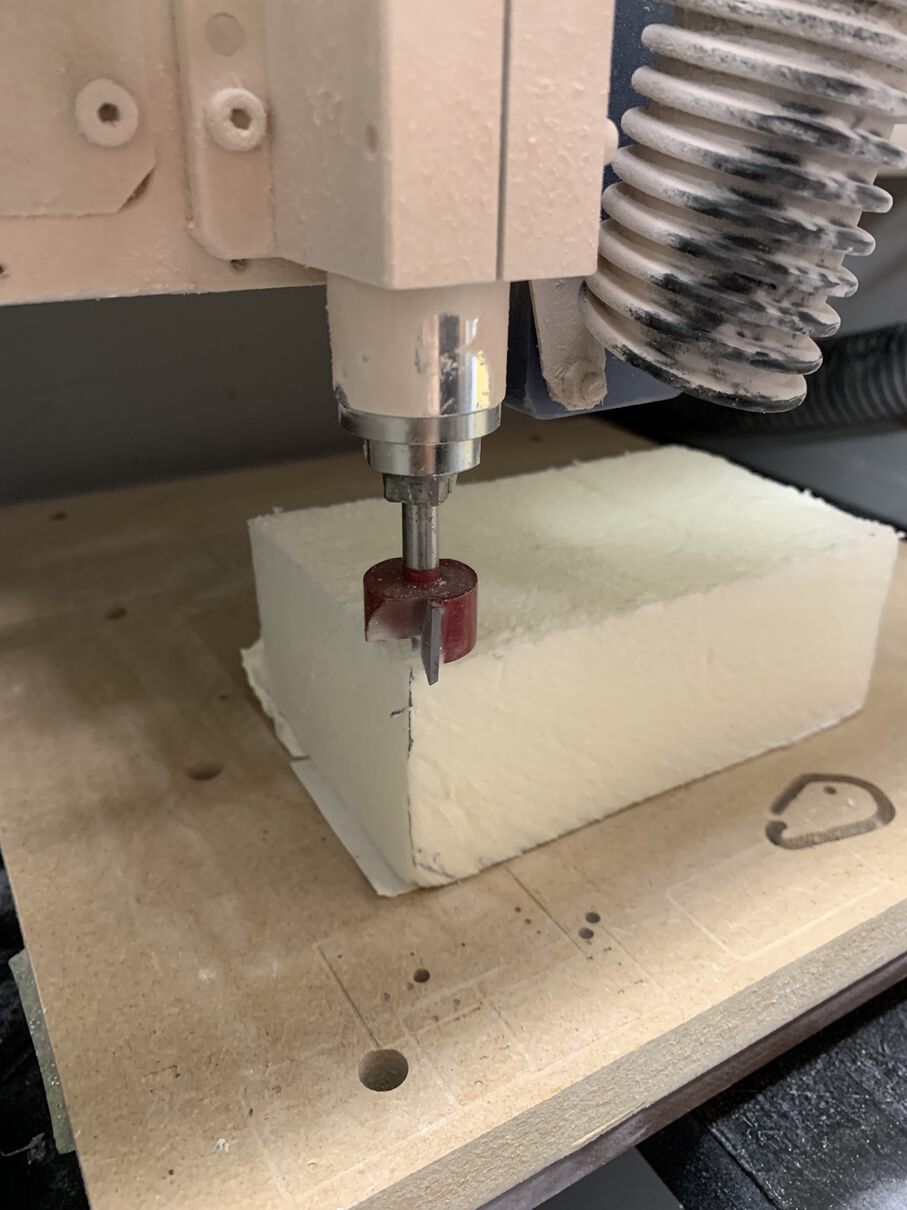
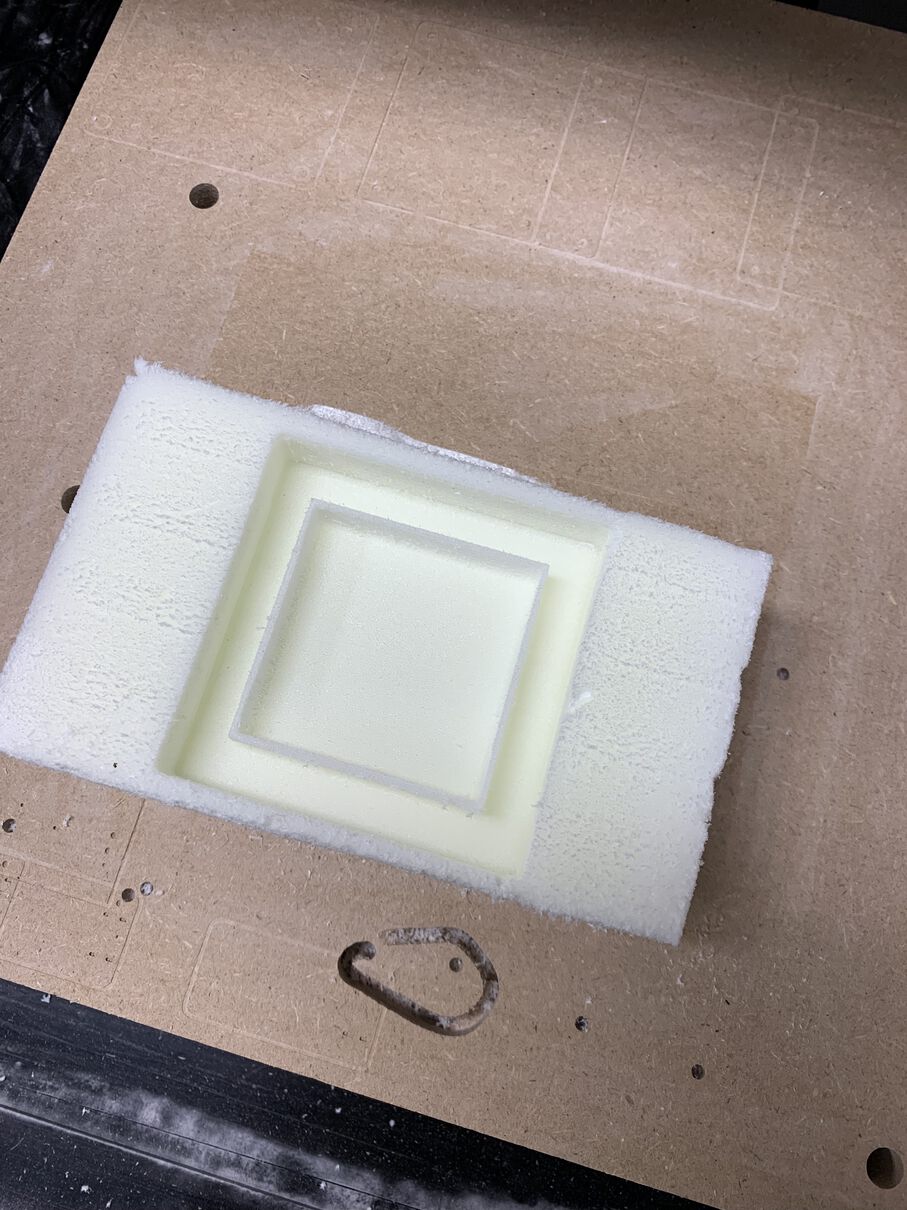
The mold material for this assignment was a jewerly sculpting wax, and to machine it, we used the Roland MX-40 milling machine available at the local FabLab. To do a test run, I first milled my job on a foam material. To get started, I needed to face the surface of the foam for it to be even.
I started by measuring the dimensions of the foam block. Mine was around 130mm wide, 76mm deep and 50mm tall.
After measuring, I applied some double sided tape to the bottom of the foam material, and placed it on the machine bed. After this I installed the milling bit in the collet. First, screw the collet into the machine head, then insert the milling bit so that about a centimeter of the shaft is in the collet. If the milling bit doesn't stay in the collet, use the two wrenches to tighten the collet a bit, and try again. Repeat until the milling bit stays in the collet by itself. Tighten down using the two wrenches.
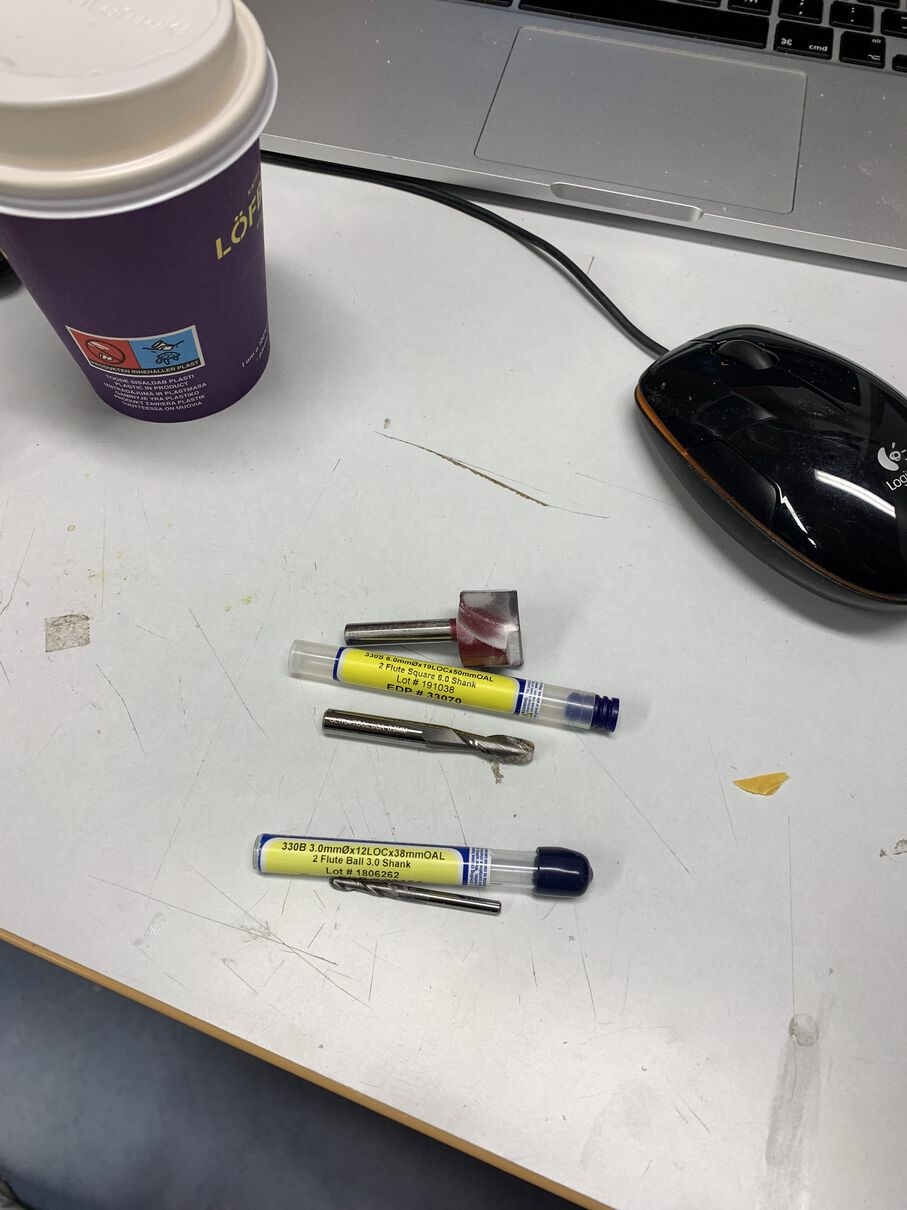
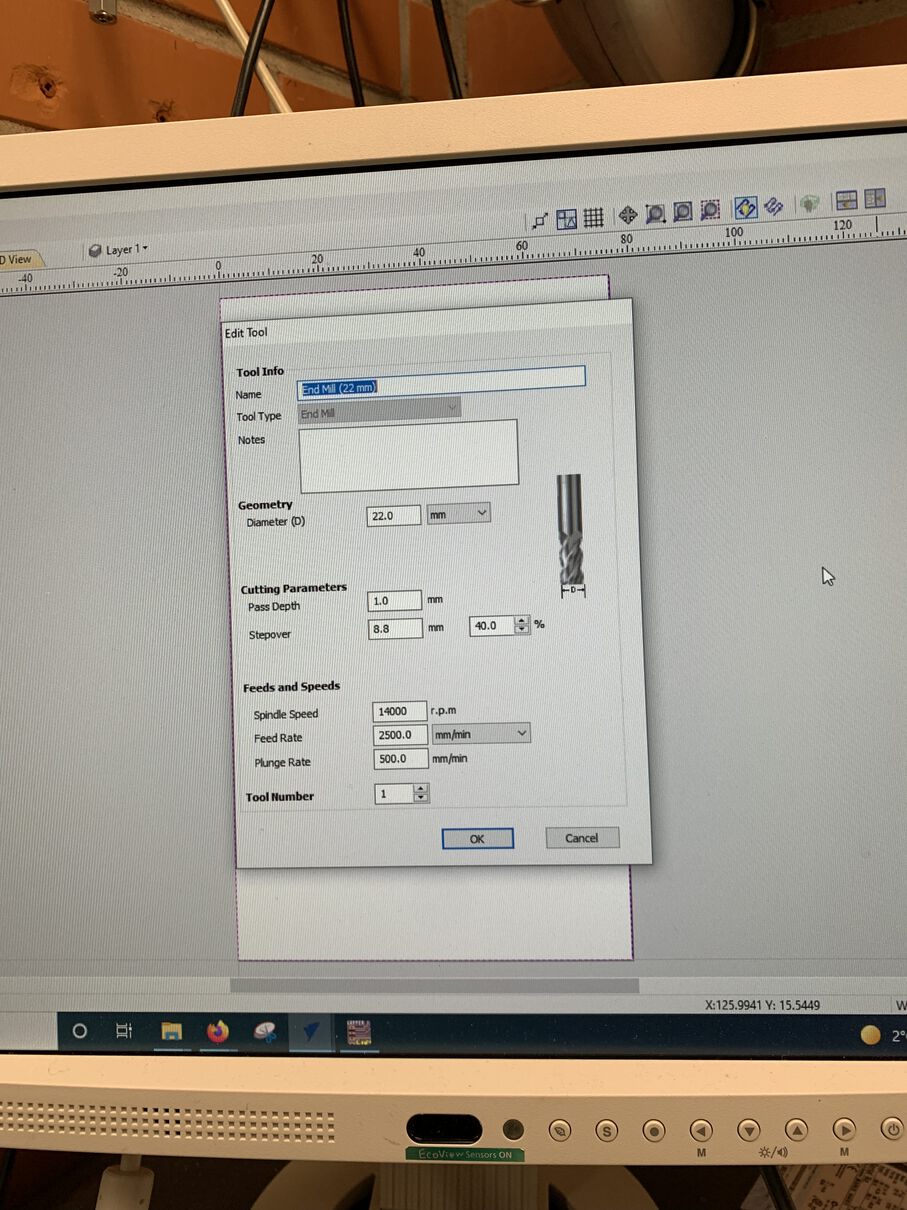
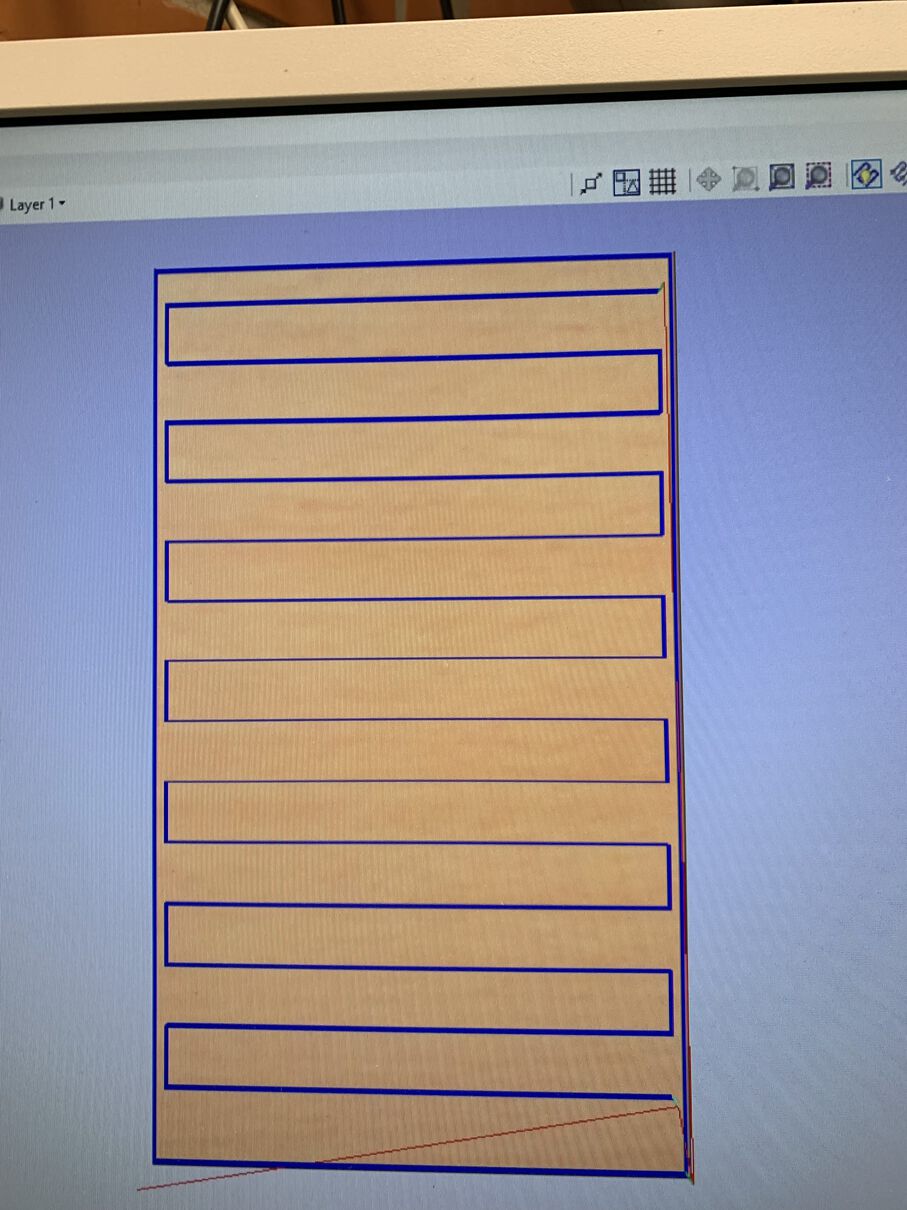
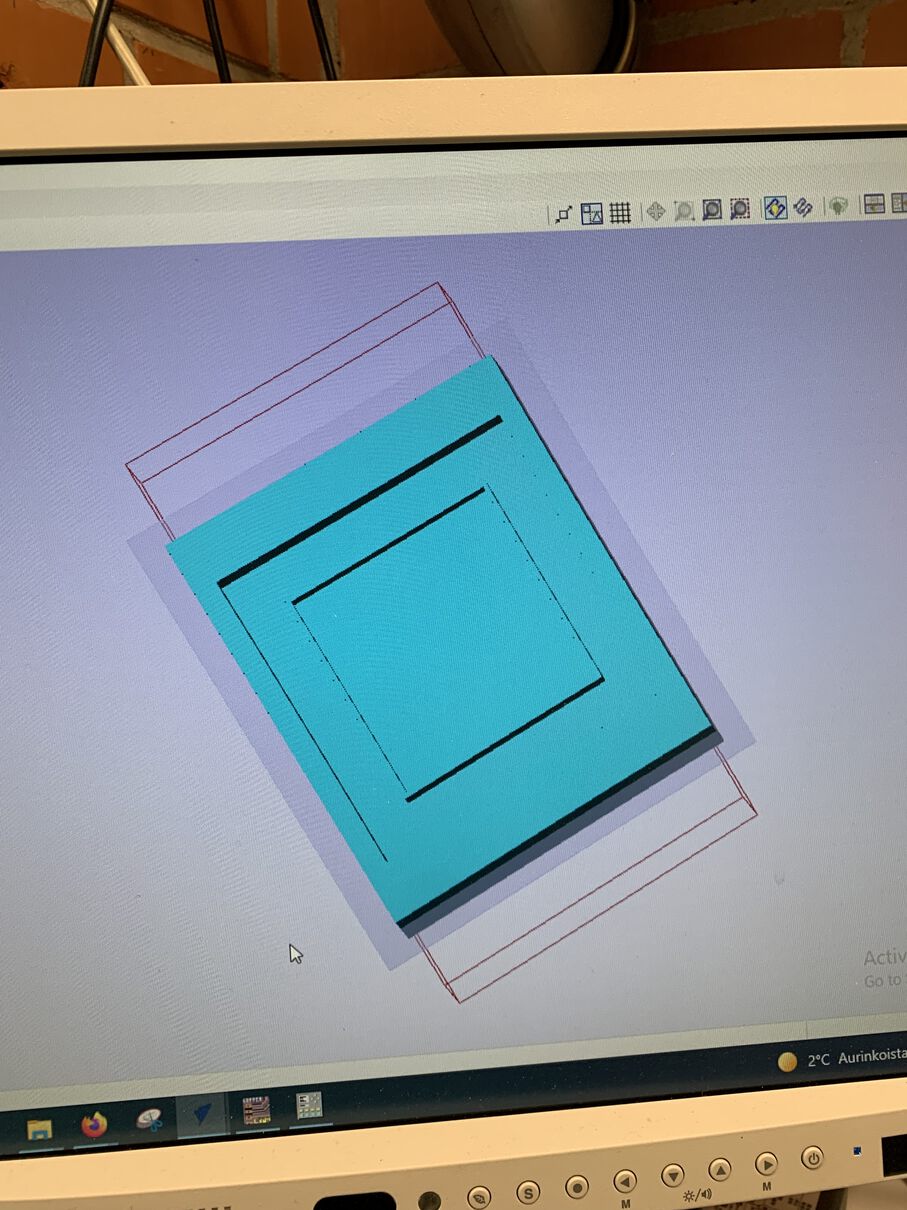
In VCarve I entered the foam block dimensions as the job size, making sure to set the Z zero position as material surface. Then I created a rectangle the size of the canvas, to mill the whole area. Next I proceeded to create a pocket toolpath from the toolpaths menu. To start, I set up the settings for the tool that I was going to use, a 22mm butterfly milling tool, on the top here:
For the plunge rate, 2mm works for foam, but for wax you want to use 1mm, due to it being a harder material. I apparently forgot to set this for the facing, so I used 1mm here. For stepover, 40% is a good default.
The rest of the settings require a bit more thinking. Spindle speed is machine dependent, for the Roland Modela MDX-40 the max spindle speed is 15 000 rpm, so I went with 14 000 rpm, leaving a safety margin of 1000rpm. As for the feed rate, you need to check the datasheet of the milling bit. Our milling bits are made by Sorotec, so I consulted their datasheet about it.
Since there is no row for foam, I went with MDF. There is also no column for a 22mm tool, so we can use double the feed value of a 12mm tool. This gives us a feed value of 0,220. If we multiply that with the number of flutes (2) and the spindle speed (14 000rpm), we get a feed rate of 3080mm/min. However, maximum XY feed rate of the MDX-40 is 3000mm/min. To conform to this, I went with a feed rate of 2500mm/min. To get the plunge rate, simply divide the feed rate by 4. Here however it's divided by 5, for some reason. Maybe there is a max plunge rate..?
After the tool settings the only other setting to worry about in the toolpath settings was the Pocket Allowance, which needs to be -11 mm (half of the tool width) in order to prevent the machine from not facing the corners of the surface.
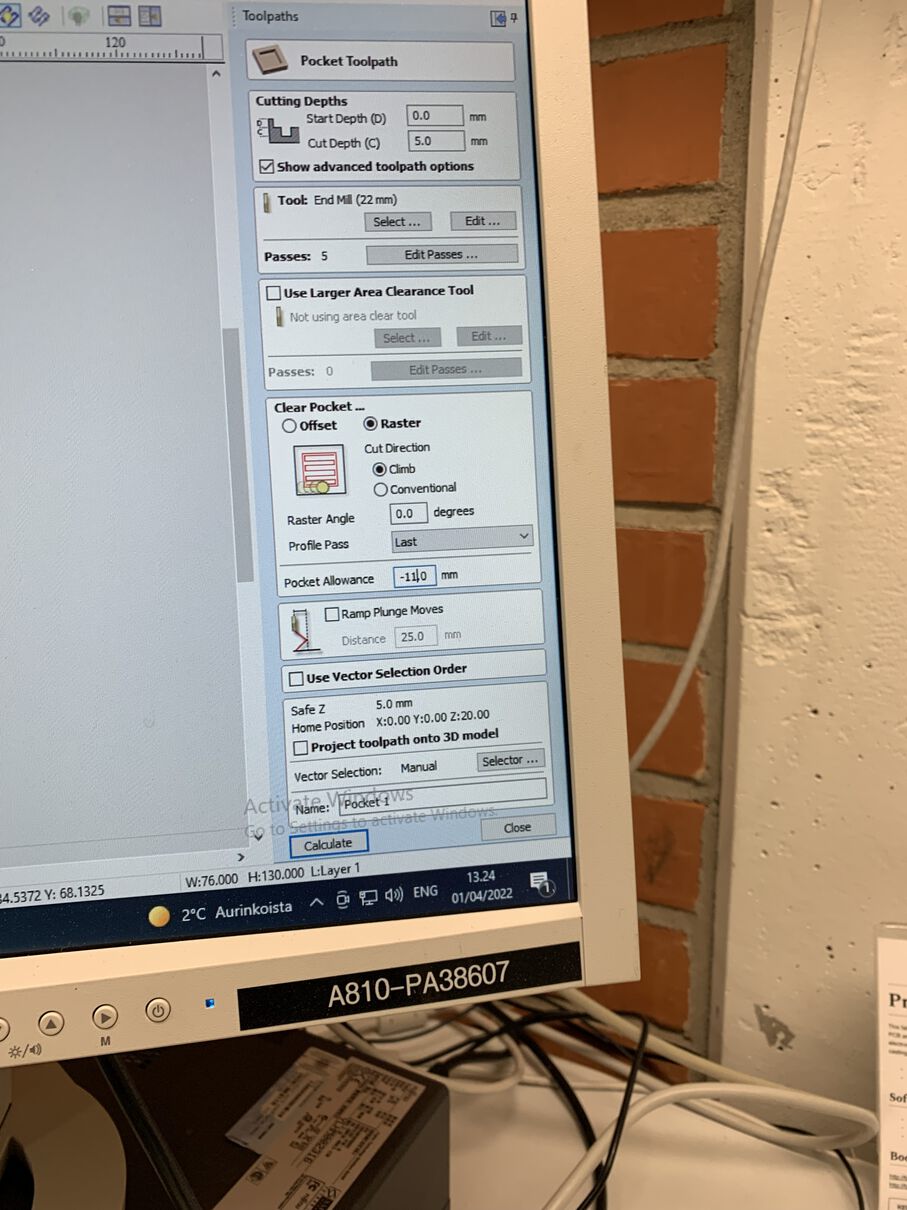
After this, the toolpath is generated and you can save it.
Next up is setting up the job in VPanel. First check that NC Code is selected as the command set in Setup, and that in the main window of VCarve the Machine Coordinate System is set to G54.
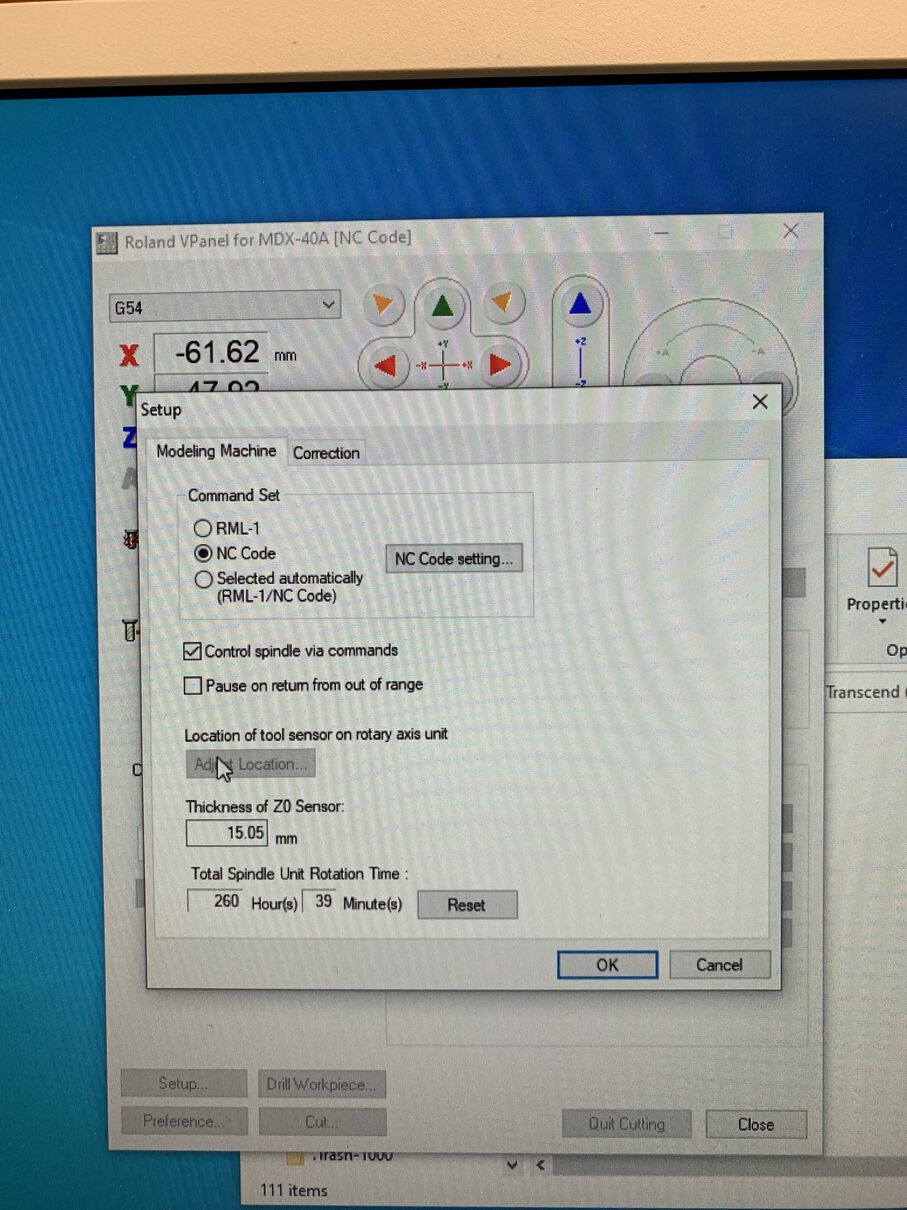
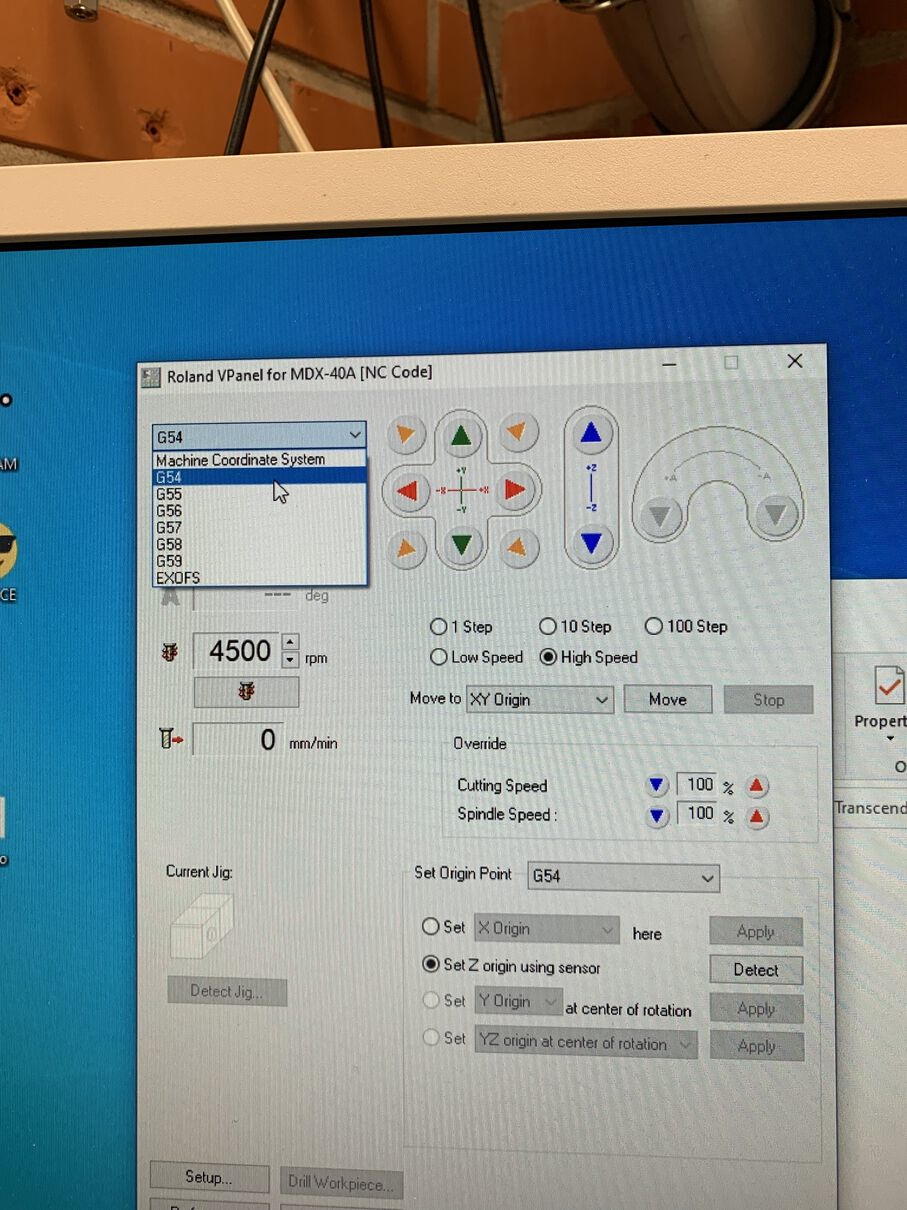
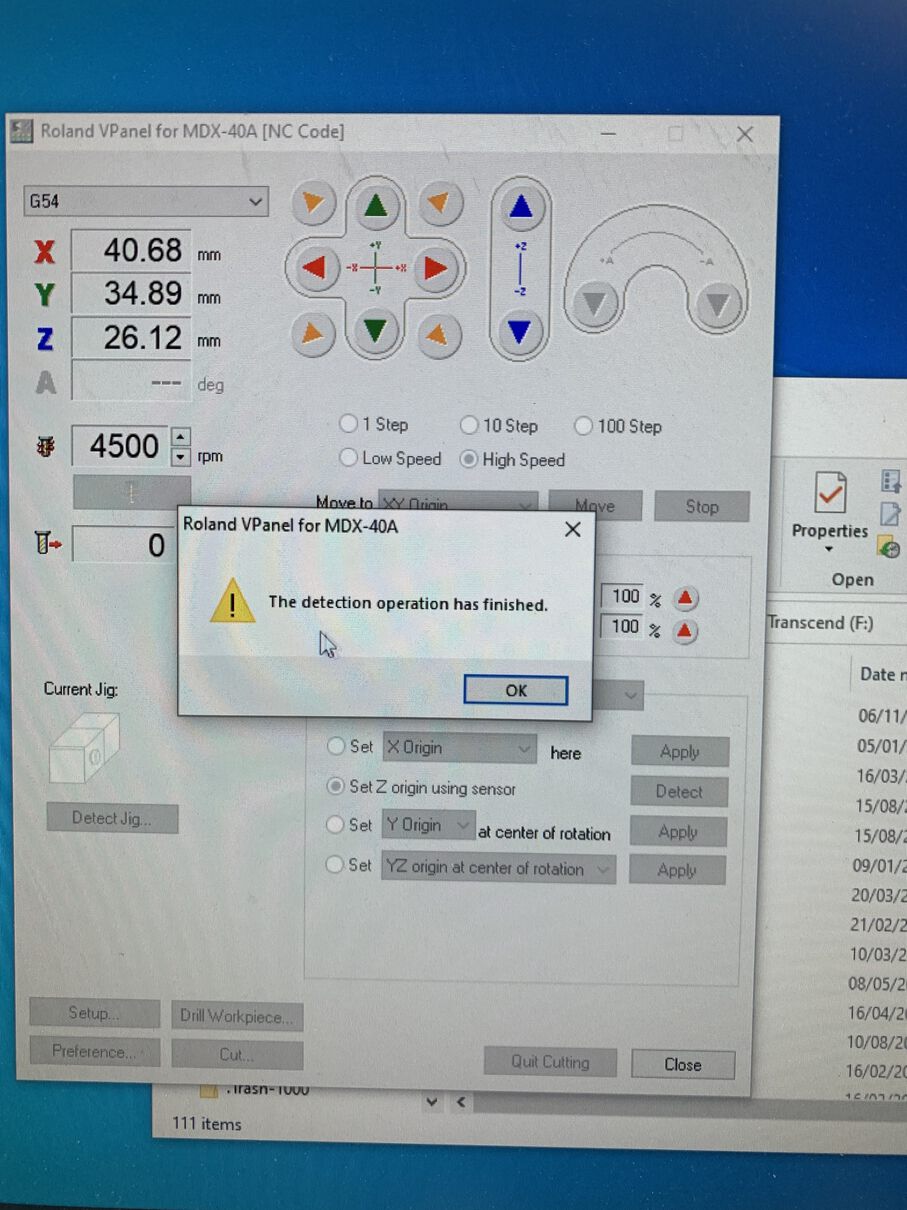
After this, we can set the Z origin. Place the sensor (located in the left inner wall of the machine) under the milling bit, making sure that the cable is connected properly. After this, close the lid and select "Set Z origin using sensor" from VPanel and press "Detect". It should take a while for the machine to calibrate the Z axis, but I must say that this is a really easy and pleasant way to calibrate the Z axis.

Next, move the milling head to the lower left corner of the material and set the XY origin:
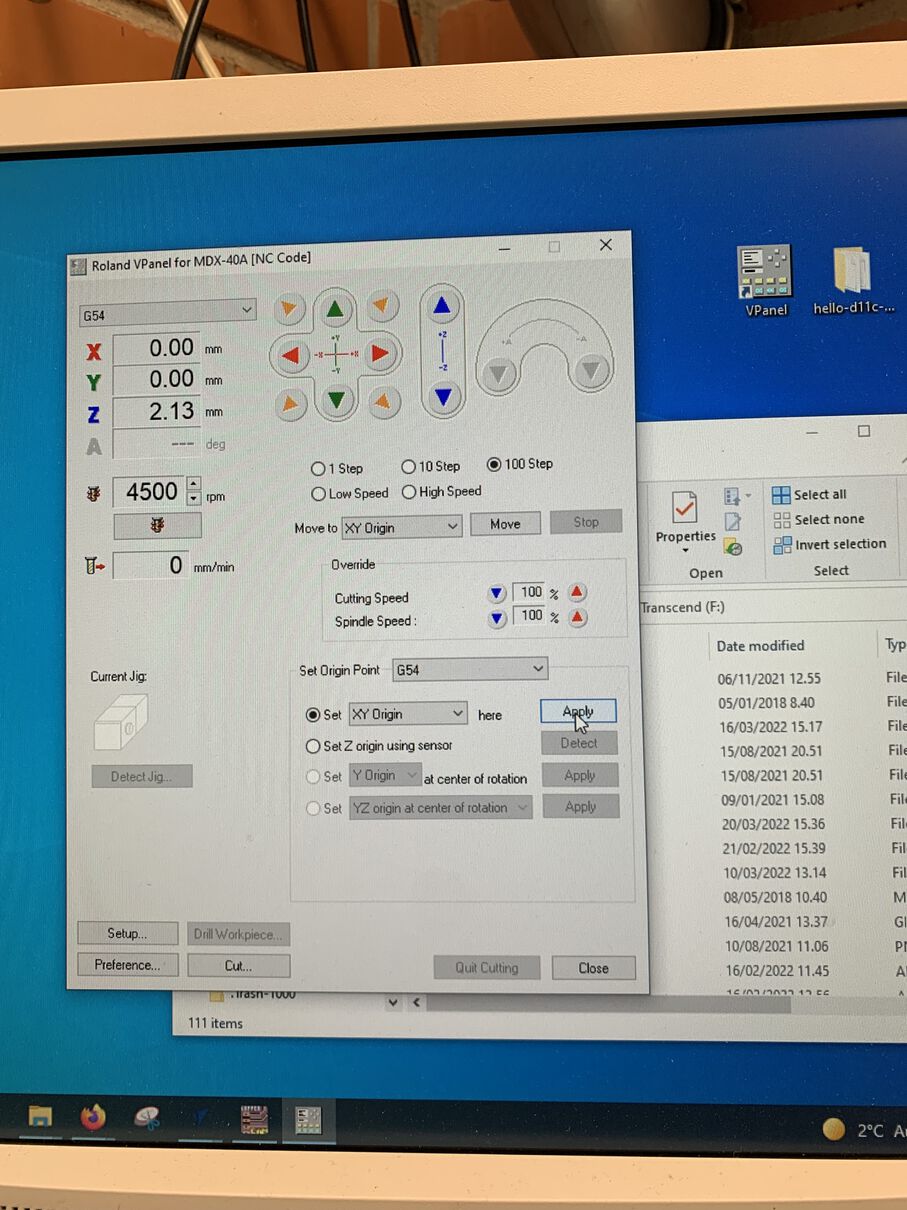
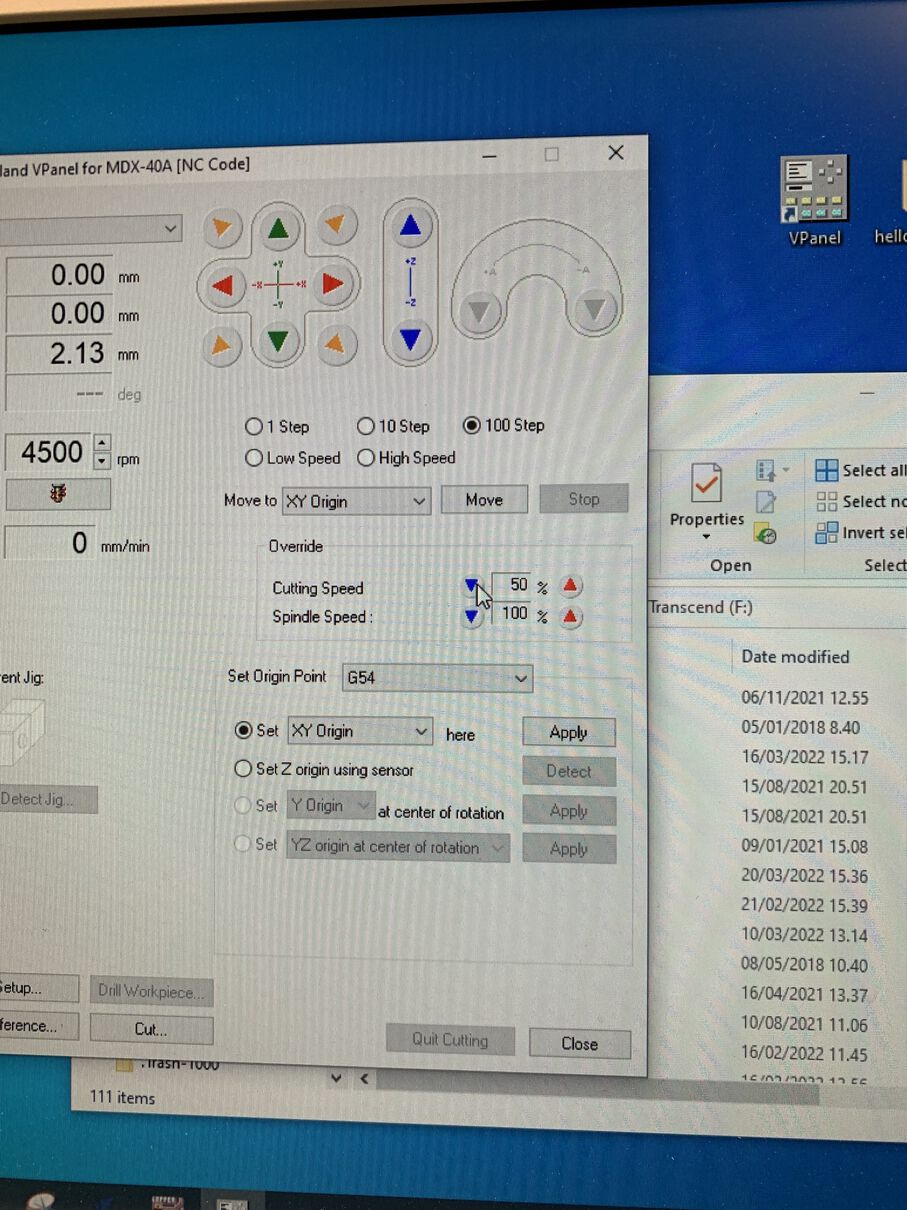
After this, we are ready to mill. Make sure you check that the cutting speed override is set around 50% and that rpm is actually 14 000.

Now we can press "Cut". Delete all previous jobs, select your facing job and press "Output". Observe the job start. If it goes well and no issues arise, you can increase the cutting speed override back to 100%.

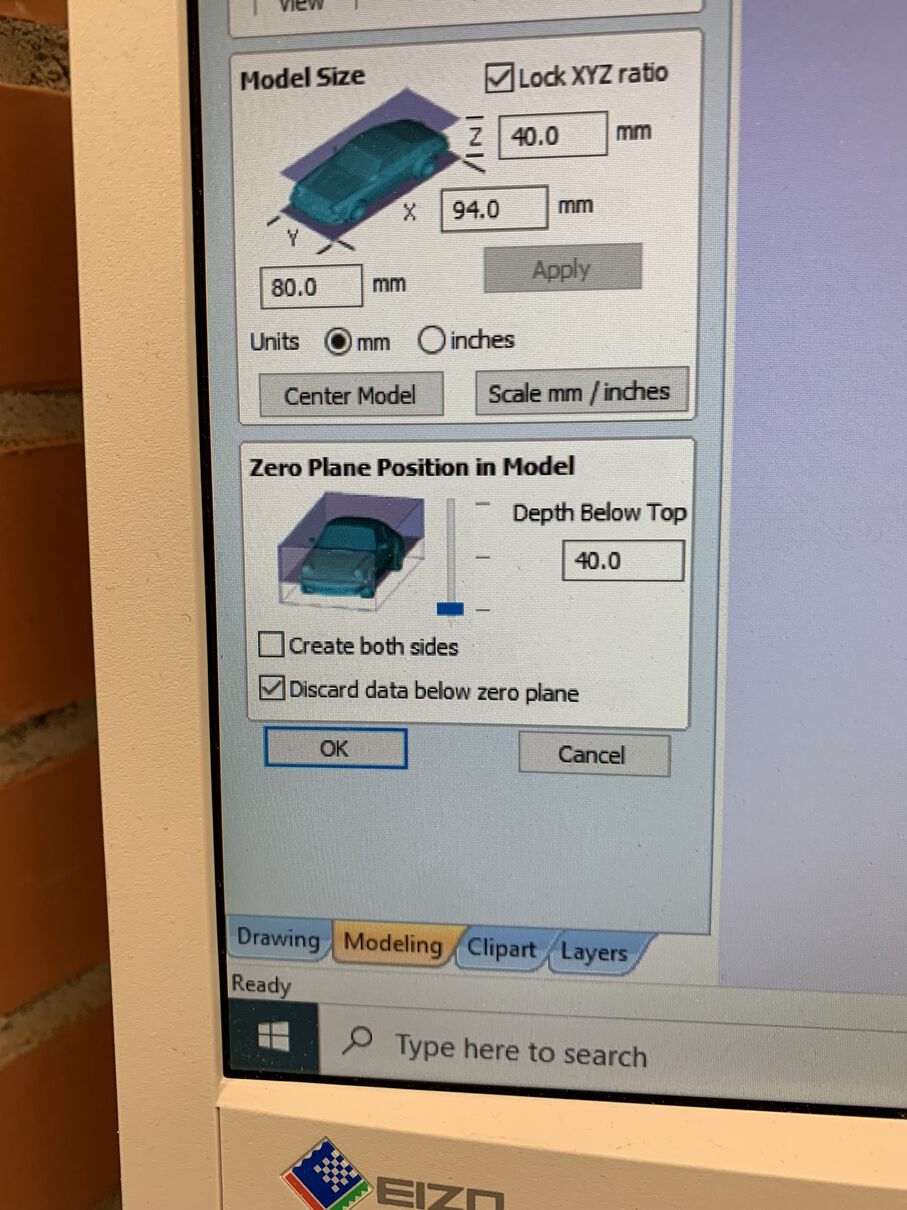
With the surface faced even, I could now carve my actual model into the foam block. To do this, I went back into VCarve, making a new job with otherwise the same settings, except the thickness of the material, which is 5mm less due to the facing. After this, I imported the .stl file of my 3D model into VCarve.
The only setting I adjusted during the import step was the Zero Plane poisition, which I set to the maximum (40mm).
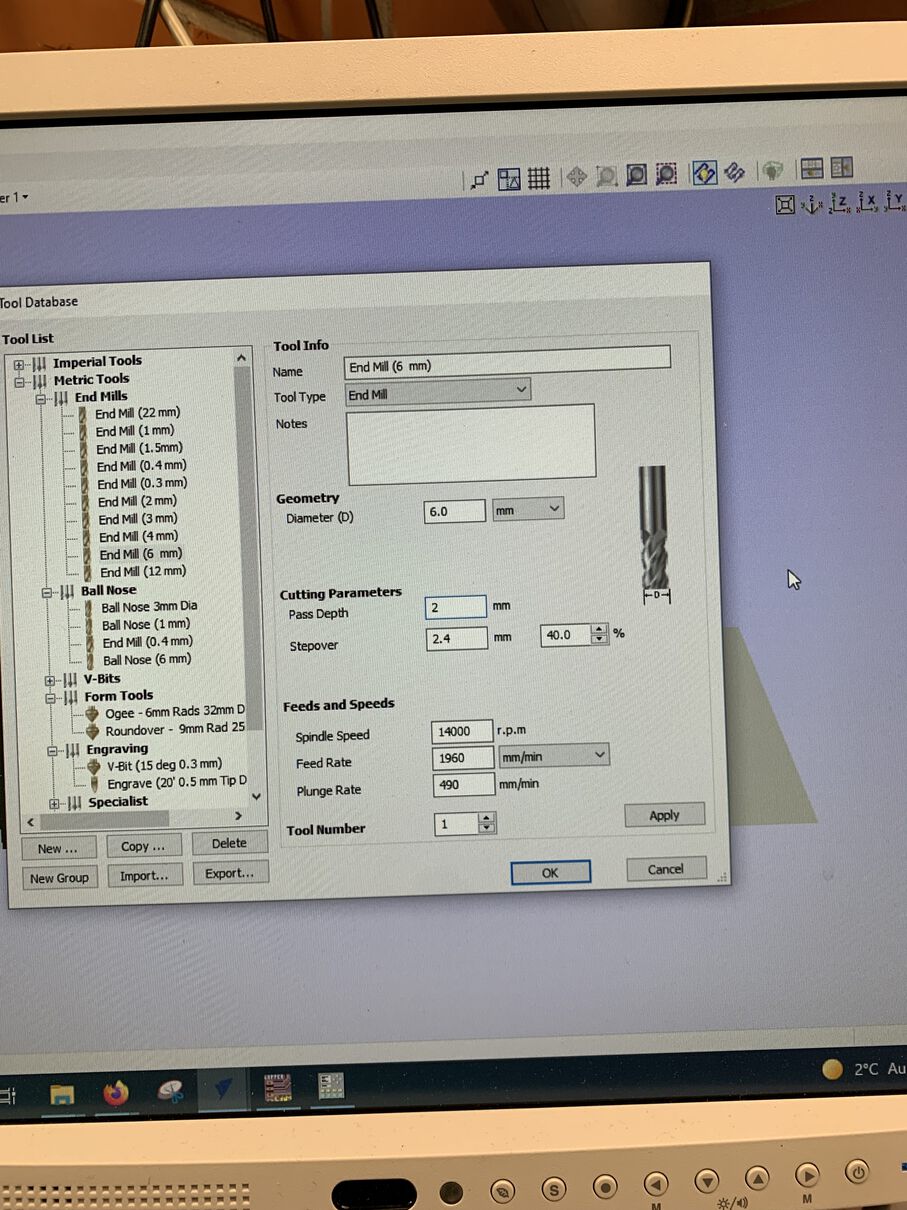
Next up I set up a 3D roughing toolpath. I didn't really touch the material settings, and went straight to setting up the tools. For the roughing I was going to use the 6mm 2 flute square bit, in the center here:
Setting up the tool settings follows the same steps as described in the facing section, except that this time I remembered to set the pass depth to 2mm!
As for the other settings in the 3d roughing path, I don't think I touched anything.
In addition to the 3d roughing, we need a 3d finishing toolpath to actually get us the final result. The process is pretty much the exact same as for the 3d roughing. The tool for this is the 3mm 2 flute ball head bit, seen at the bottom here:
The tool settings follow the same formula as before. As for the toolpath settings, I decided to try the Offset machining strategy, instead of the Raster. Not sure if this made much of a difference in the end.
After this you are ready to mill again. Change the milling bit to the 6mm one for roughing, recalibrate the Z axis, and load your roughing job into VPanel. After the roughing is done, follow the same steps for the finishing, and you're done!
Make sure to use the vacuum cleaner to clean up the milling machine and your mold.
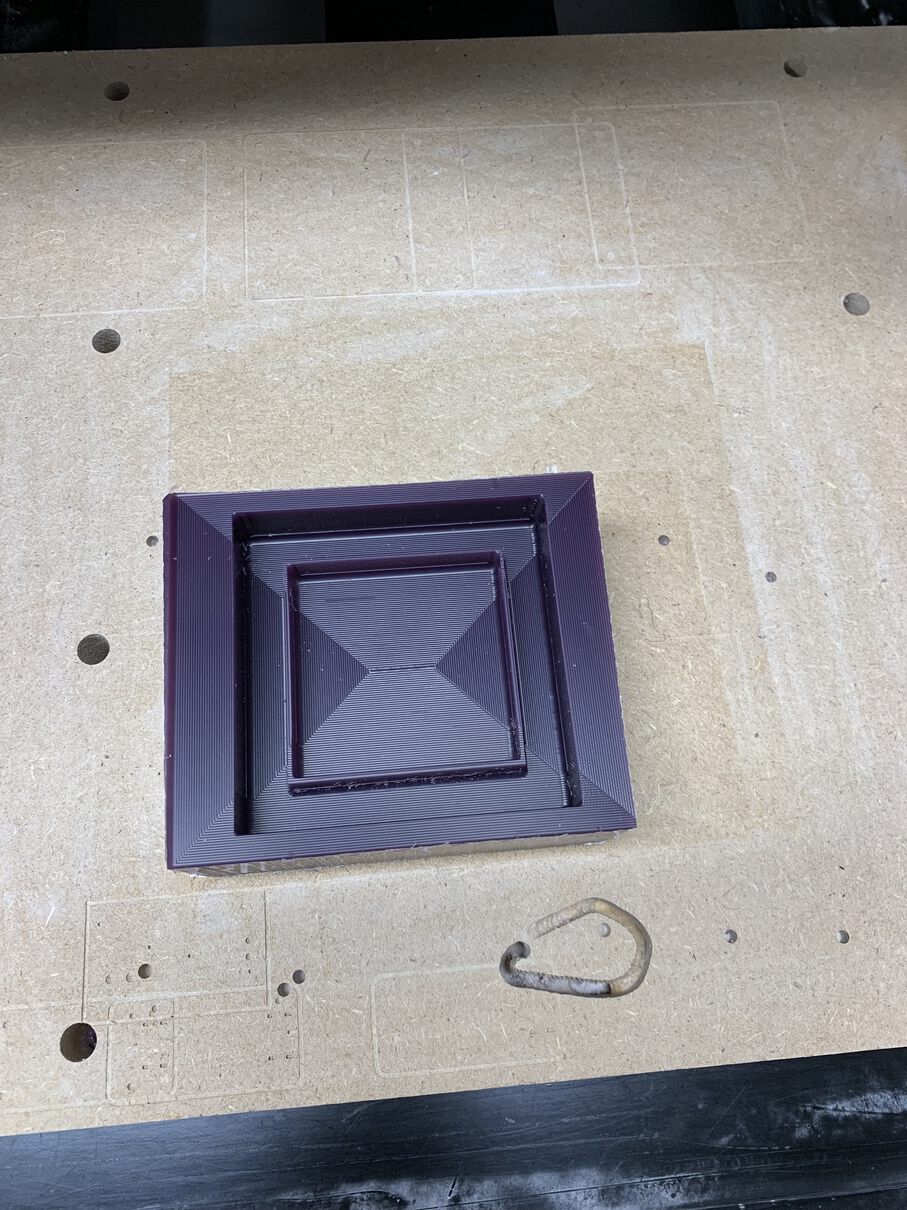
Now it was time to repeat the same roughing and finishing process for the wax. The wax was smooth enough, so I didn't face it before milling it, instead I set a 1mm gap above the model when setting the material settings for the roughing job.
This was pretty much the only change to the foam, aside from the initial material dimensions and making sure that the Pass Depth is 1mm. Otherwise I used the same tool settings for foam and wax, and it seemed to be fine.
Casting
For casting, I started by making a silicone mold using the Mold Star 15 SLOW silicone. I reviewed the datasheet to make sure what I was working with and to see how hazardous this stuff was.
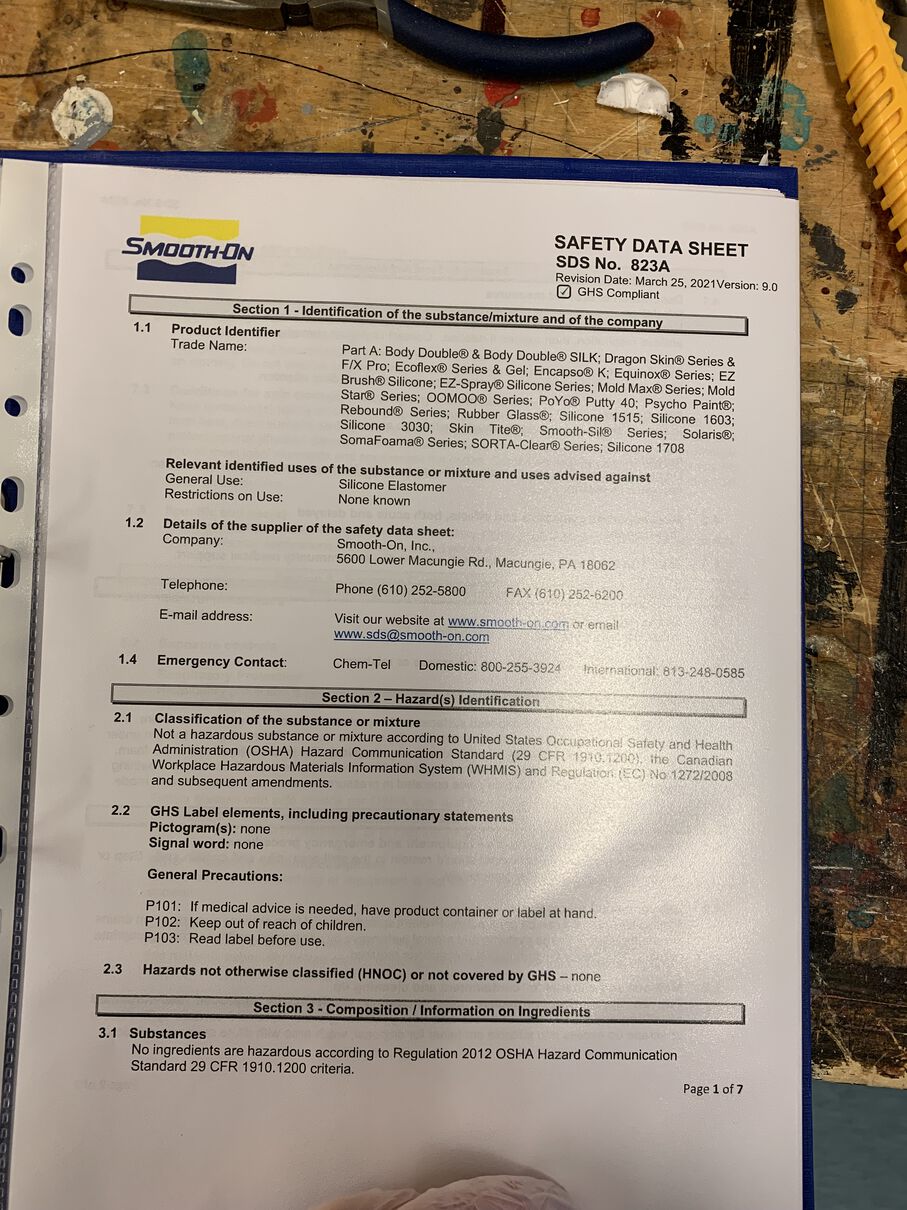
Luckily, silicone seems to be pretty safe to work with, not being even an irritant it seems. Still, I took precautions and wore a jacket and gloves to prevent any spills.
I would also be using the silicone thinner, so I also checked the datasheet for that:
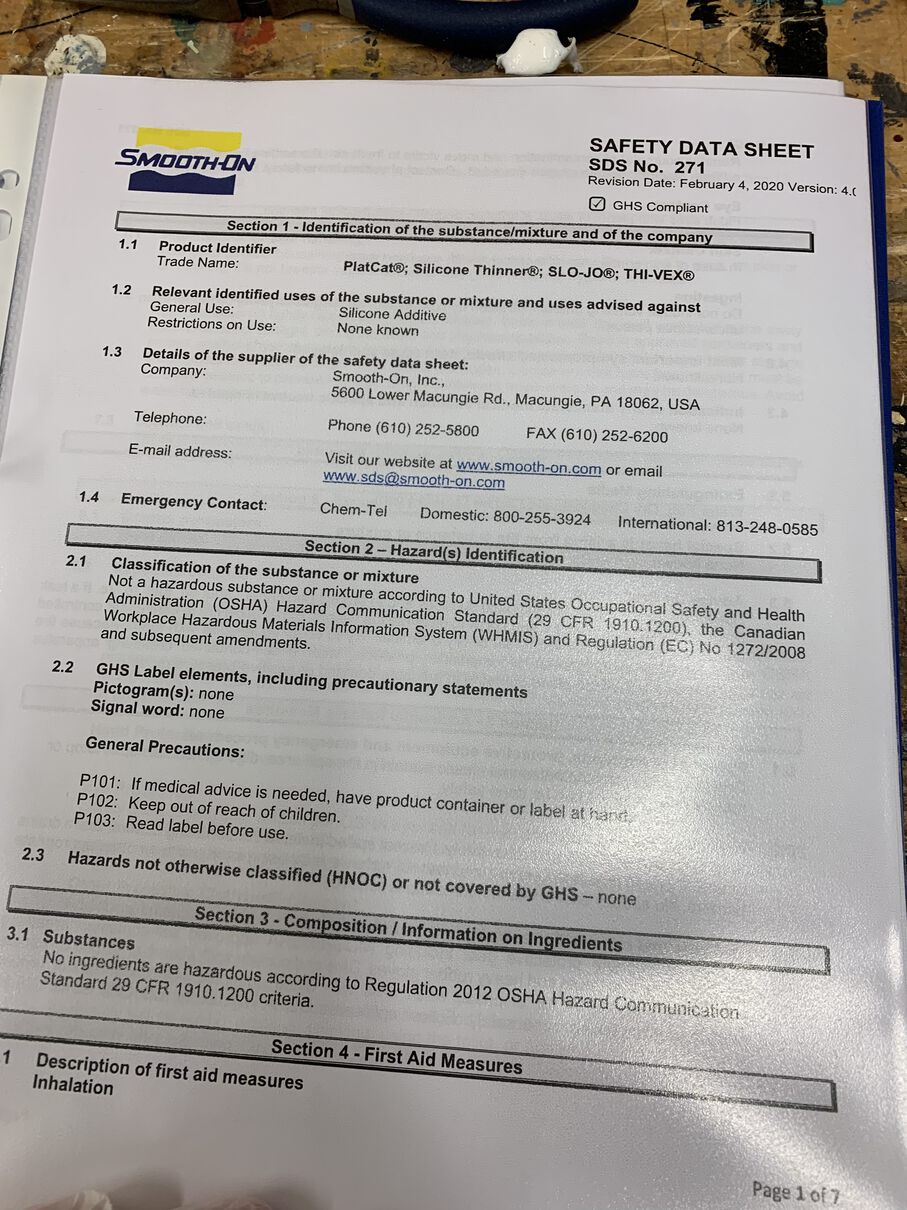
Like the silicone, the silicone thinner seems to be pretty safe to work with too, luckily
After reviewing the datasheets I got to work. I unfortunately don't have much photos from the working stage as I was doing it alone and didn't want to mess up my phone with my sticky icky gloves.
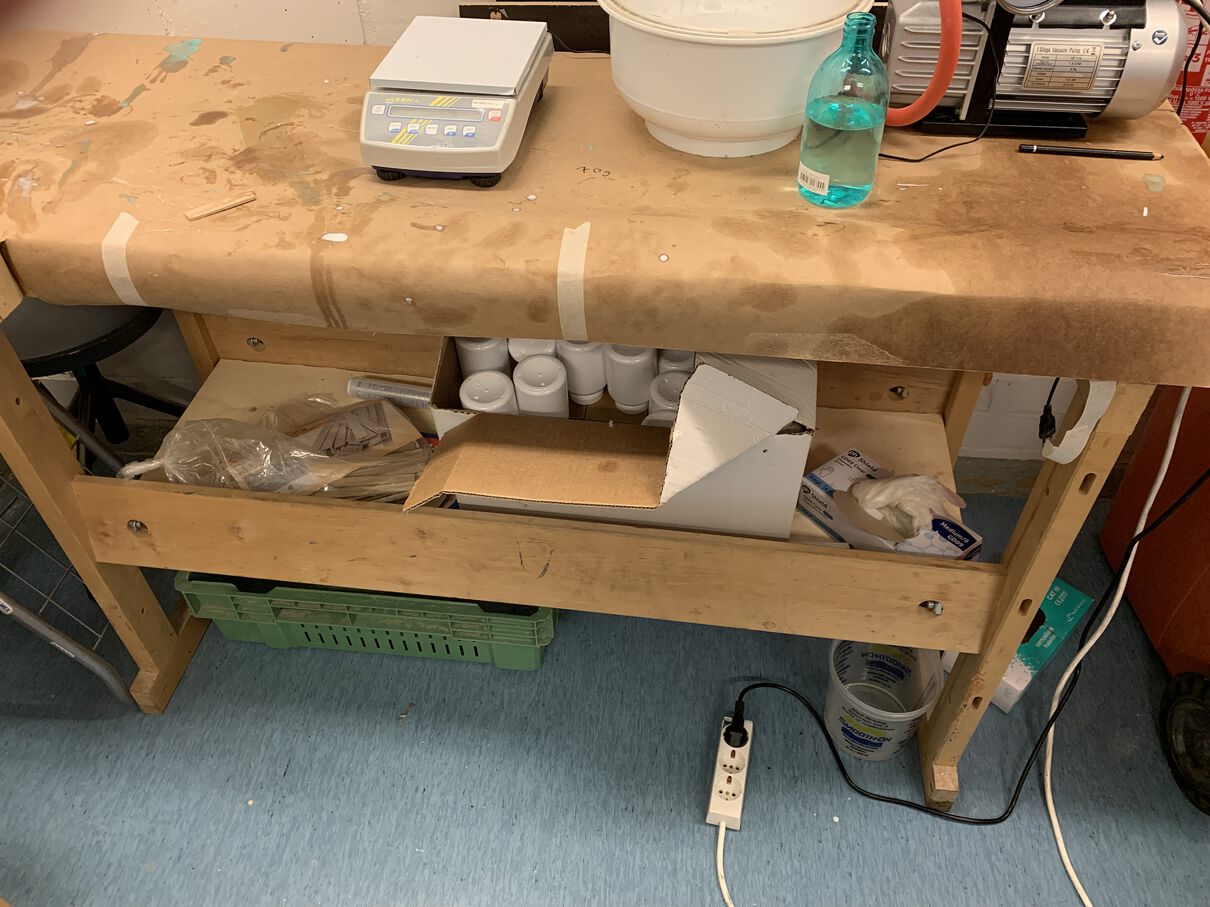
I started by collecting all the materials I would be needing: the silicone, silicone thinner, my mold, and water. I also needed a container to mix the silicone in, as well as some mixing sticks. These can be found under the casting station, alongside safety gloves:
At this point I also checked the mixing ratio for the silicon compound from the package, which was equal parts A and B, by weight. Easy enough!
Next, I placed my mold on the scale, taring the scale, and filling the mold with water to see how much silicone I would need to mix. For me, the mold took about 70g of water, so I decided to mix about 80g of silicone, just to be safe.
First, I made sure that each of the two individual parts of the silicon compound were mixed properly by using a mixing stick. Make sure to use a separate mixing stick for part A and part B! You should mix each part for about a minute, making sure to really mix all the stuff from the bottom and sides of the container. I also mixed the silicone thinner, again making sure to use a new mixing stick. The silicone thinner is pretty fluid though, so it doesn't require that much mixing.
After I had all the parts properly mixed, it was time to combine them. I took one of the white pill bottles from under the mixing workstation, and placed it on the scale, making sure to tare the scale. Then I poured 35g of part A, 35g of Part B, and 10g of the silicone thinner into the pill bottle, taking the mixing stick from the silicone thinner and mixing the parts in the pill bottle for about a minute.
After the mixture seemed to be thoroughly mixed, I placed it in the vacuum pump to get rid of all the bubbles in the mixture. I plugged the valve and turned the pump on, letting the pressure rise to where the red arrow is on the gauge, and then slowly opening the valve to release the pressure back to 800.
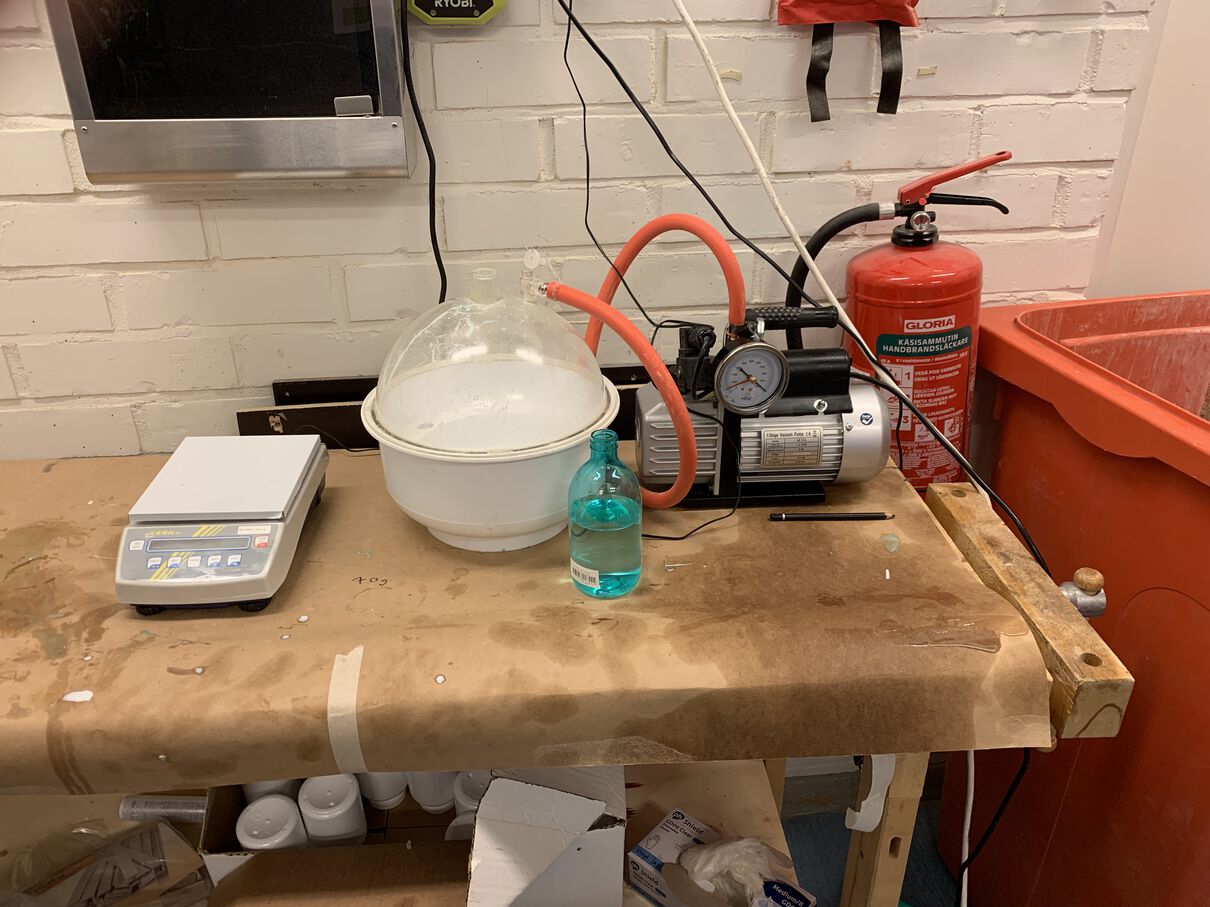
I did this 3 times to make sure I got rid of all the bubbles. After this the mixture is ready for pouring into the mold. Make sure to pour it slowly, in a thin line, to make sure no air gets trapped in the silicone when pouring!
After this, you wait for the curing time specified in the package (around 4 hours for the slow mold star).
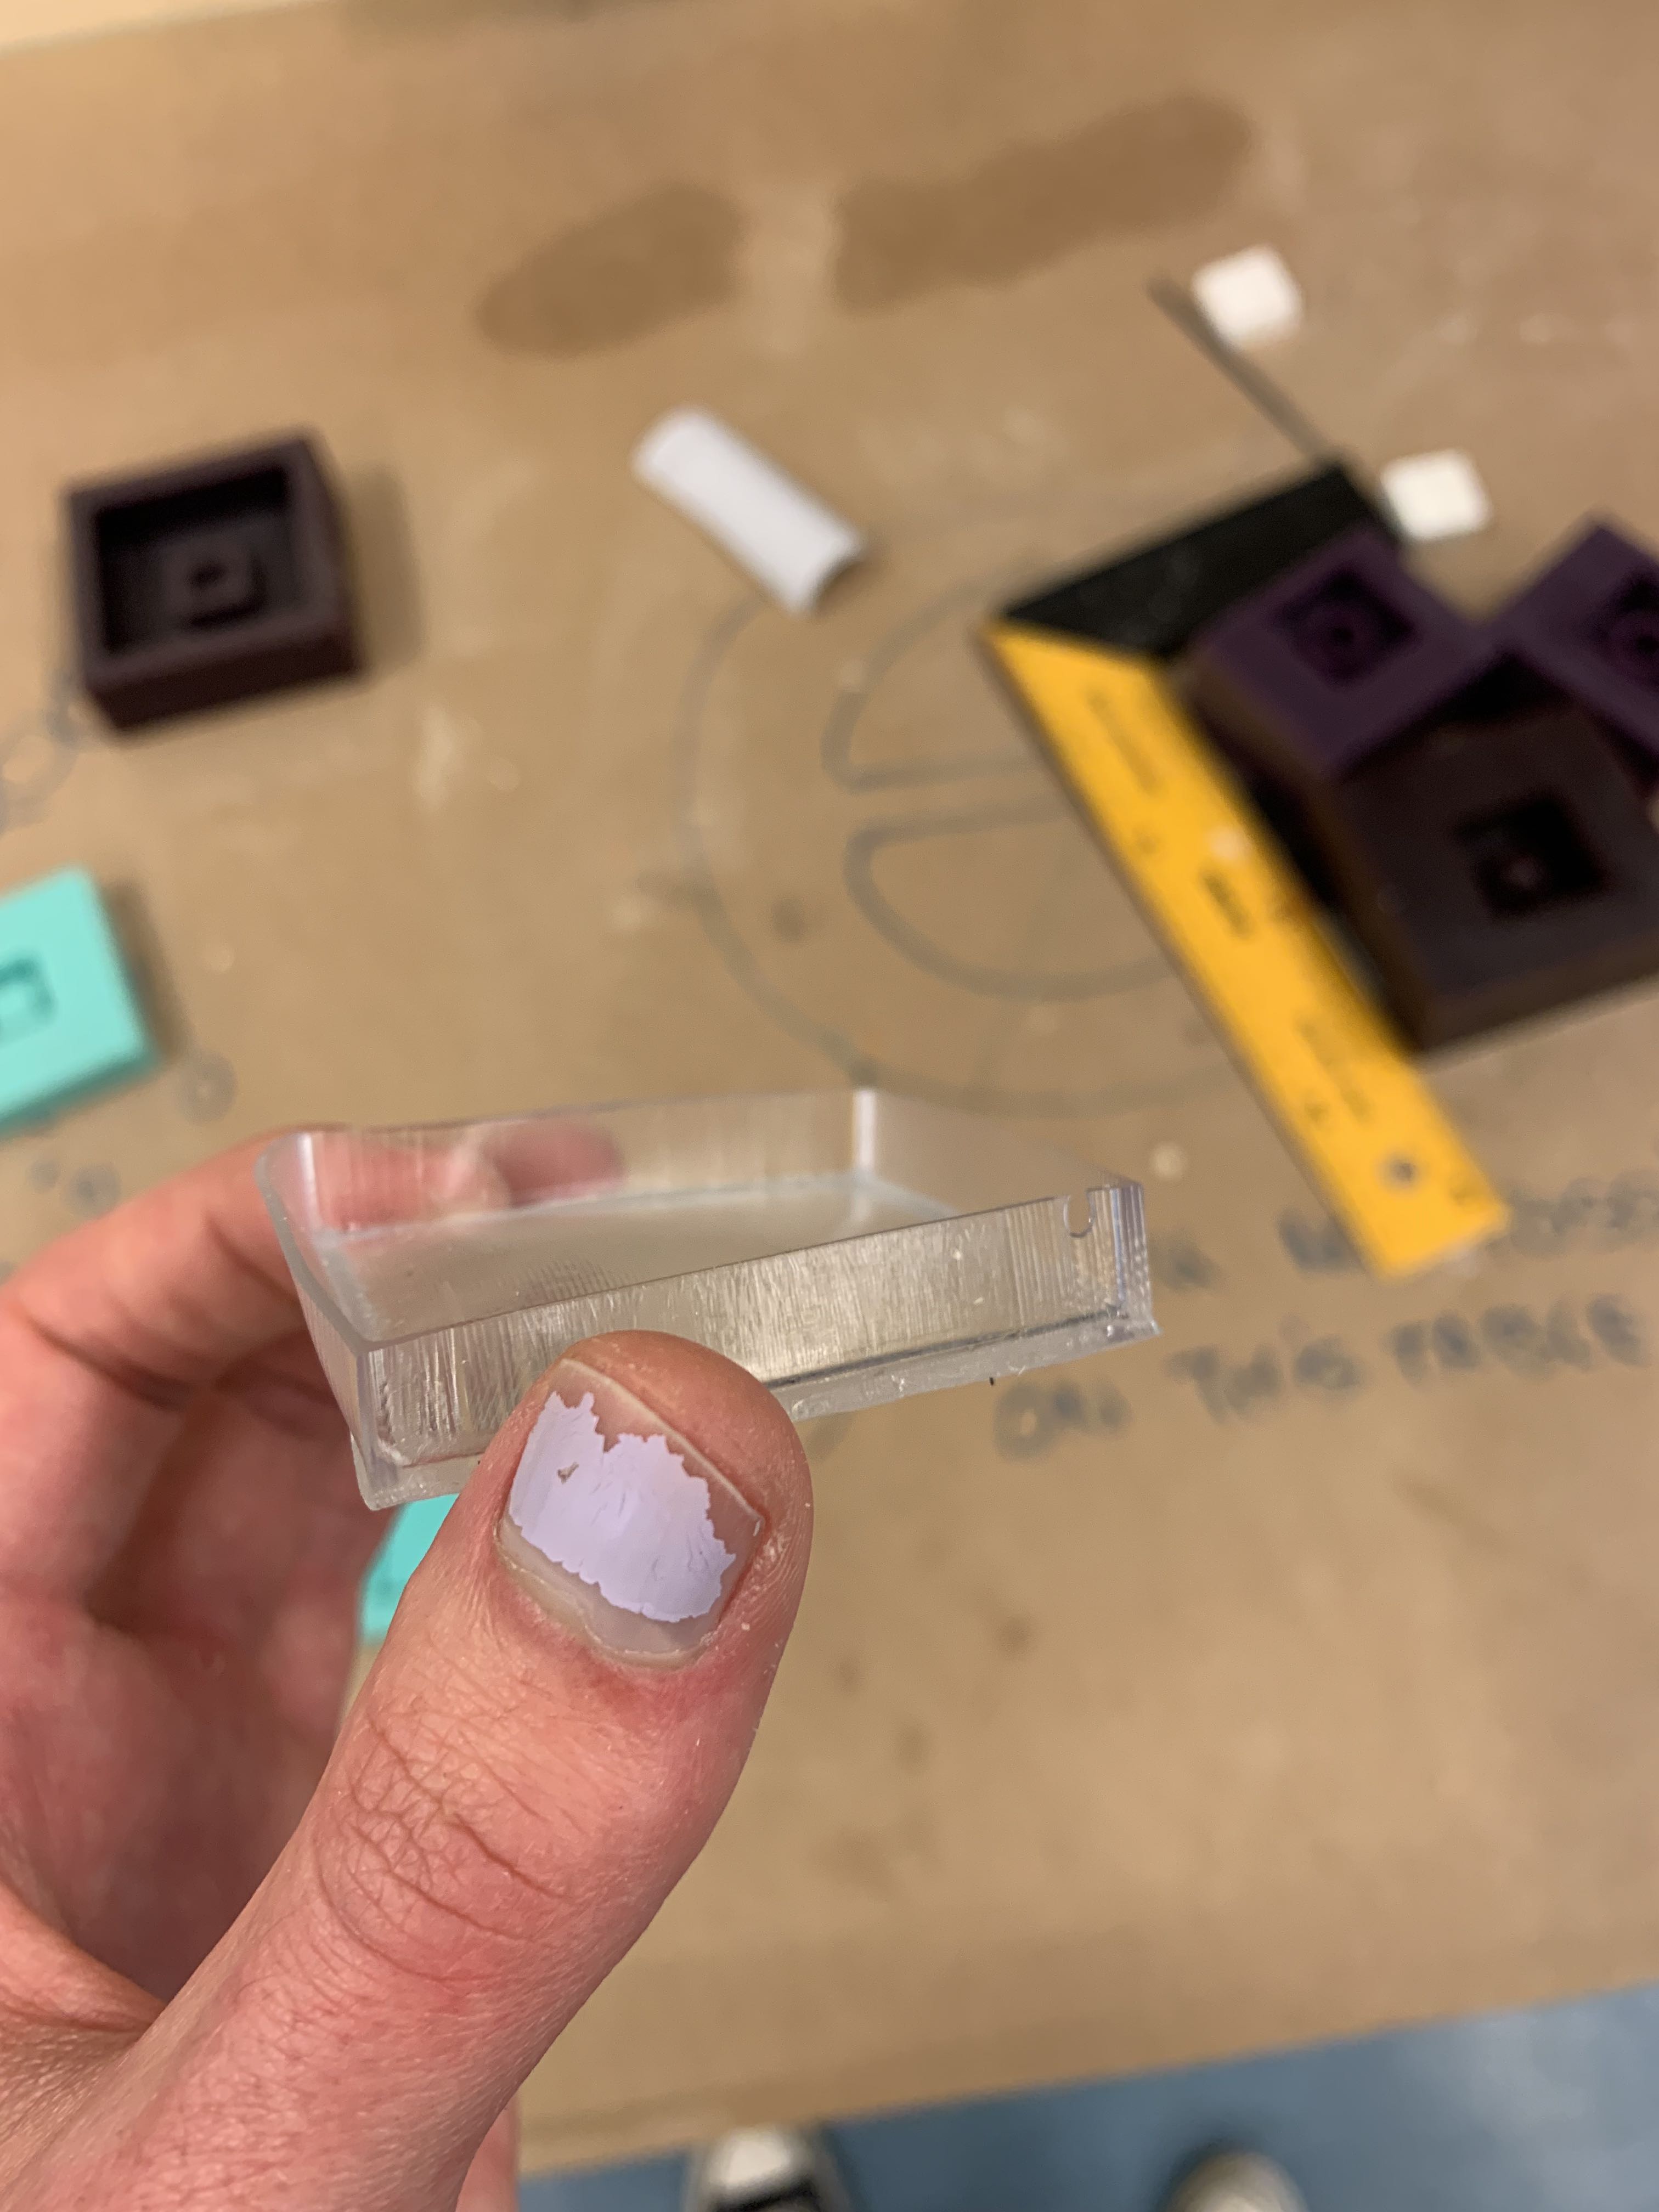
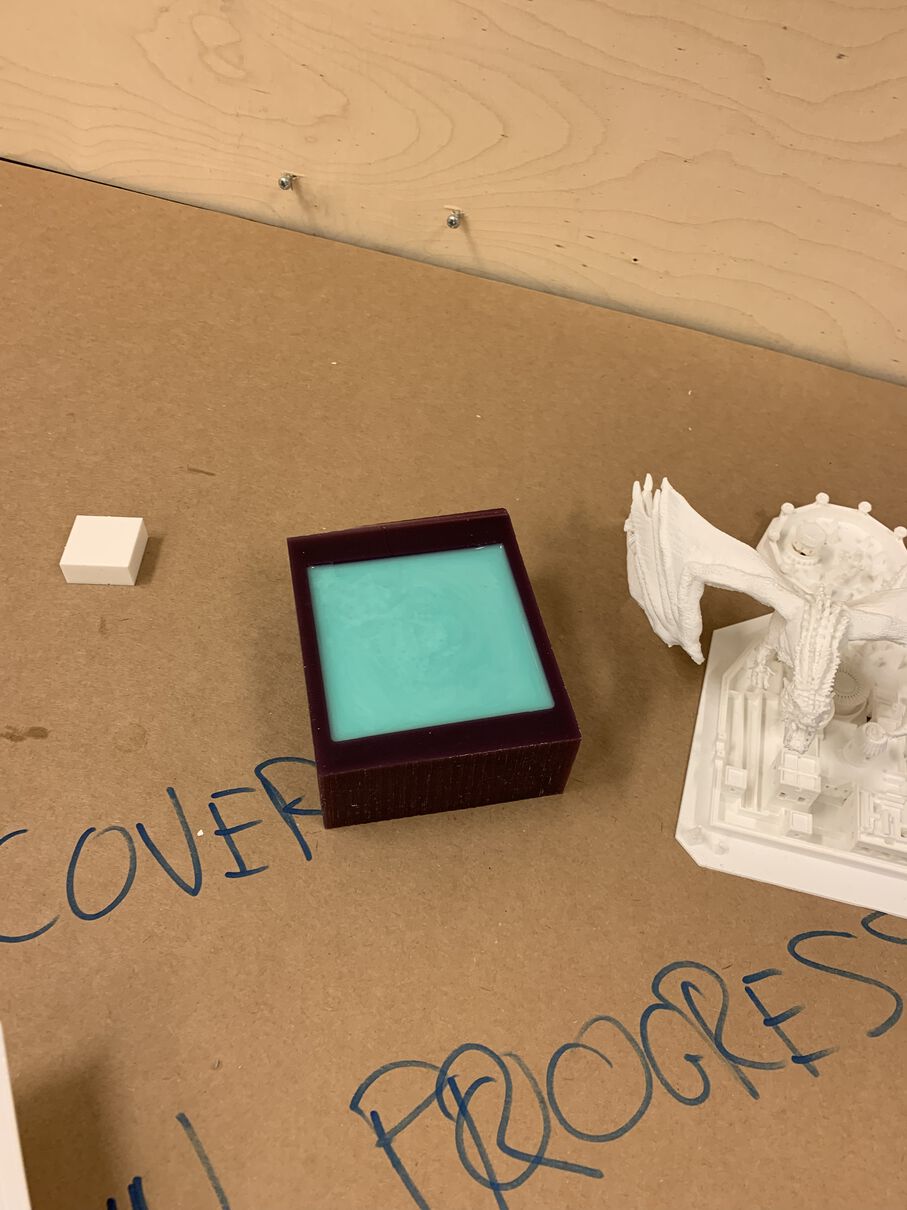
The next morning I came to check how my silicon was doing, and it turned out fine, other than one of the parts of the mold breaking off when I removed the silicon from the mold. Downsides of doing such a thin mold I guess.
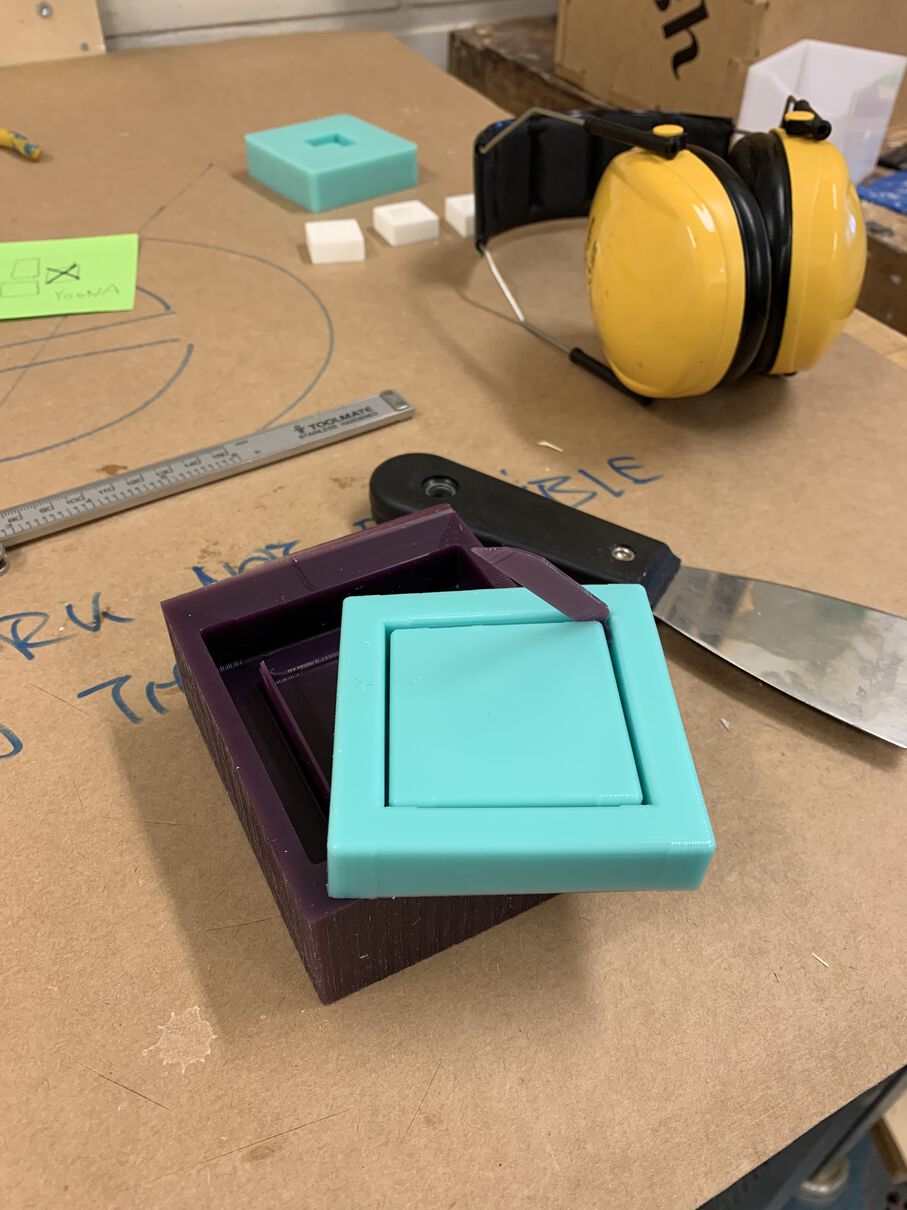
It was also at this point that I realized that my mold was probably a bit too thin... Given that silicone is a soft material, the walls contract a little bit inwards and make it harder to get material in. Thicker walls would definitely help with that. The floor of the tray was also the same thickness as the walls, so I really needed to be careful with pouring as not to overflow the mold.
For casting the final tray, I used a clear resin. To my knowledge, resin in general is pretty toxic stuff, so I checked the datasheet to make sure I was working with the right amount of caution:
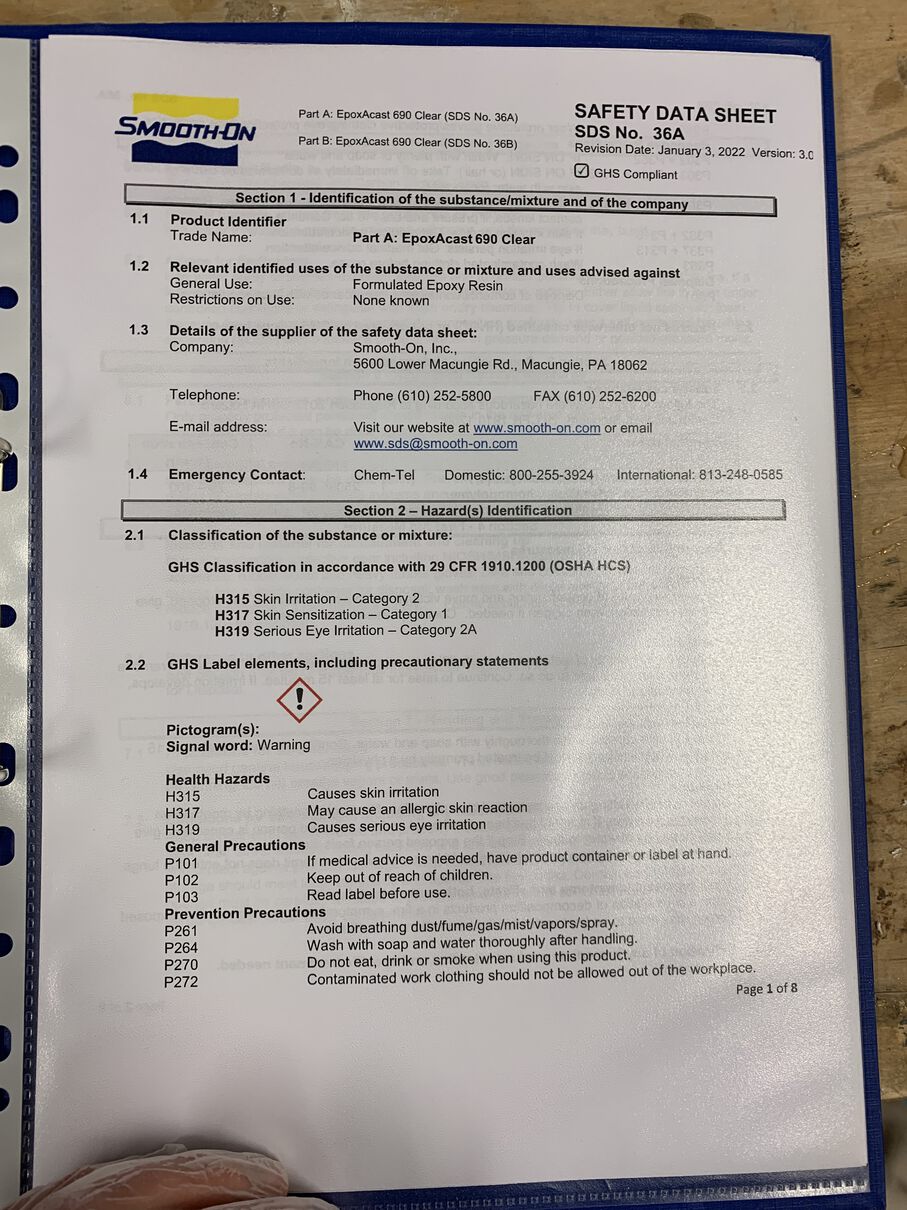
As you can see, you shouldn't get this stuff on your skin or your eyes. It also smells pretty strongly, so I made sure to use a mask. If I was working with larger amounts, I'd want to work in a well ventilated room, but since my mold used only about 10g of resin, I thought it would be fine.
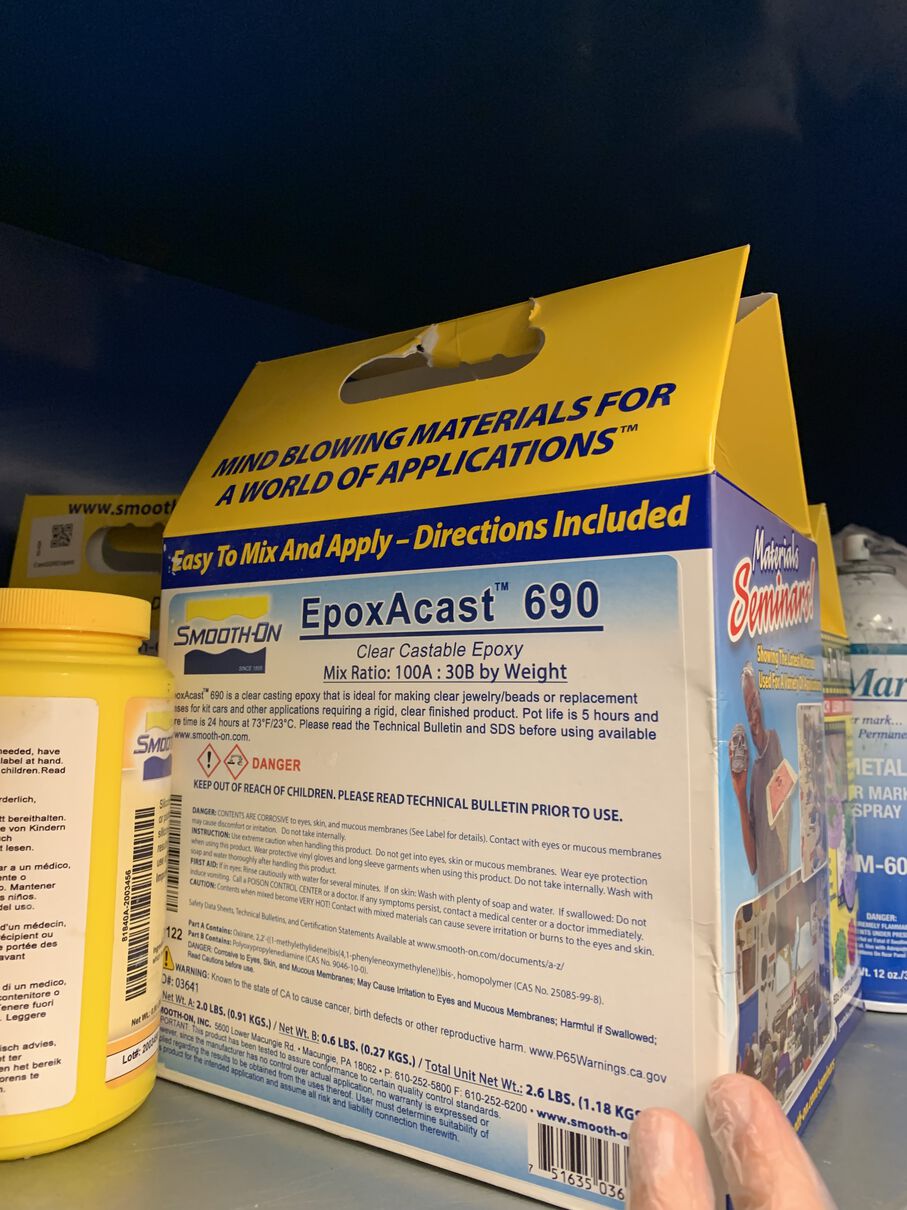
The process for casting the resin was similar to the process of casting silicone, except no thinner is needed, as the components of resin are generally more fluid. It's still good to mix them though! Also, for this particular resin, the ratio was 100A to 30B.
I was aiming for around 10 grams, so I went with 7g of A and 2,1g of B, although my end result was nearly double of that at 16g of resin. Pouring small amounts of this material is pretty difficult. In the future I could maybe pour the part B first, which is more liquid, and thus harder to pour accurately, and then try to pour part A as accurate as possible based on the amount of part B you managed to pour. We'll see, I'd like to work with this clear resin in the future.
Once I recovered the cast from the mold, it was pretty clear that I failed. The cast was all squiggly and sticky. Not sure if this is due to the very thin material thickness, or the if I messed up the ratio for mixing. Possibly both. This is a important learning for the future, definitely start with thicker walls. There also were some air bubbles, one huge one near one of the walls. Putting the resin in the mold in the vacuum pump would solve that, or maybe using a butane torch to quickly skim over and burst any bubbles.