Week 03: Project Management
Our assignment for Week 3 was to:
- Create a page for the project management assignment on your website.
- Describe how you created your website on that page.
- Describe how you use Git and GitLab to manage files in your repository.
I'm going to start by describing how I got my GitLab repository and local Git set up, and then move on to describing how I created my website.
Setting up your GitLab repository
To get started, we need to create a new repository in GitLab, which is where our code will live. To do this, click on the "New project"-button on the GitLab Projects overview -page:

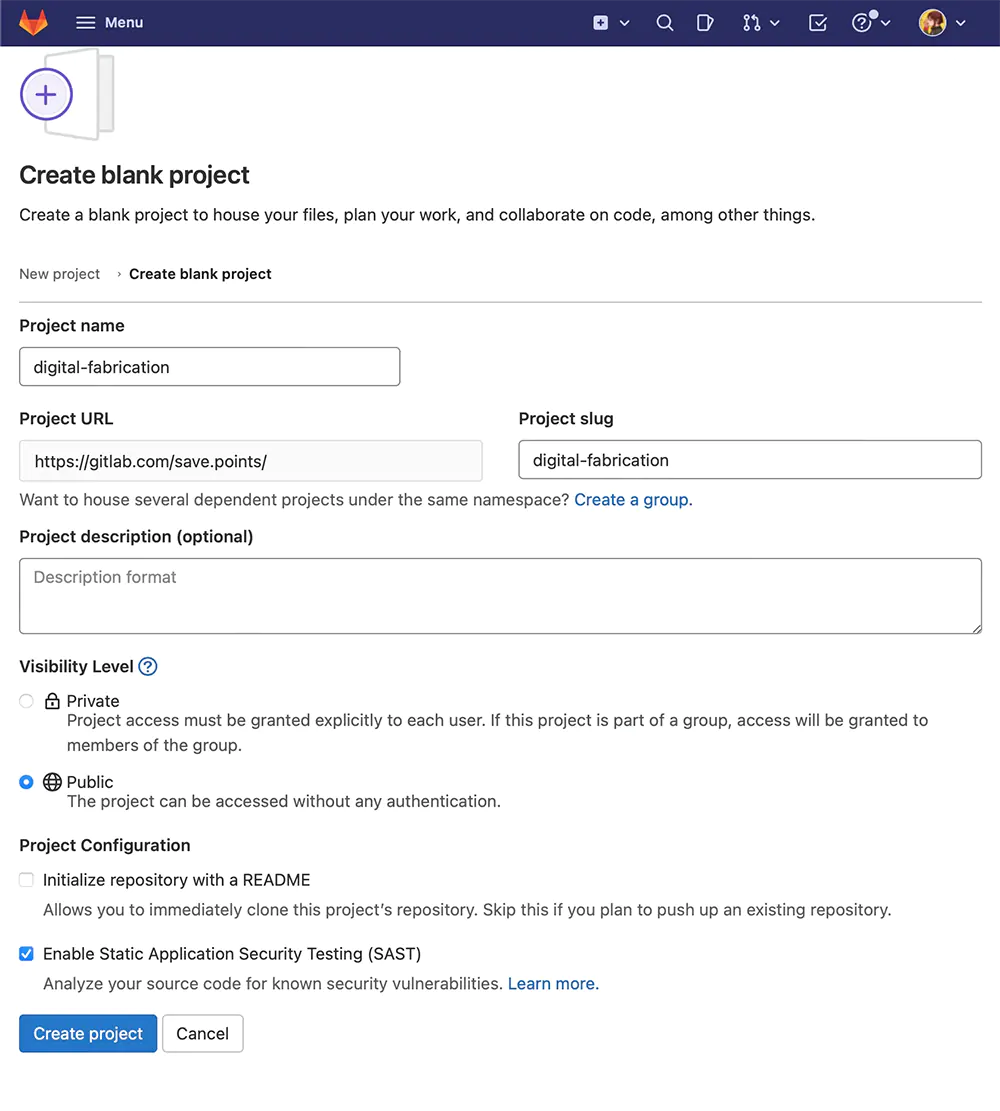
After this, you are greeted with a form. We were instructed to enter digital-fabrication as the name for our repo, so that is what we are going with.
At this point it's also important to set the repository to public, so that the teachers and other classmates can view it. Rest of the settings don't really matter here, I opted to create a README.md as it's what I'm used to.
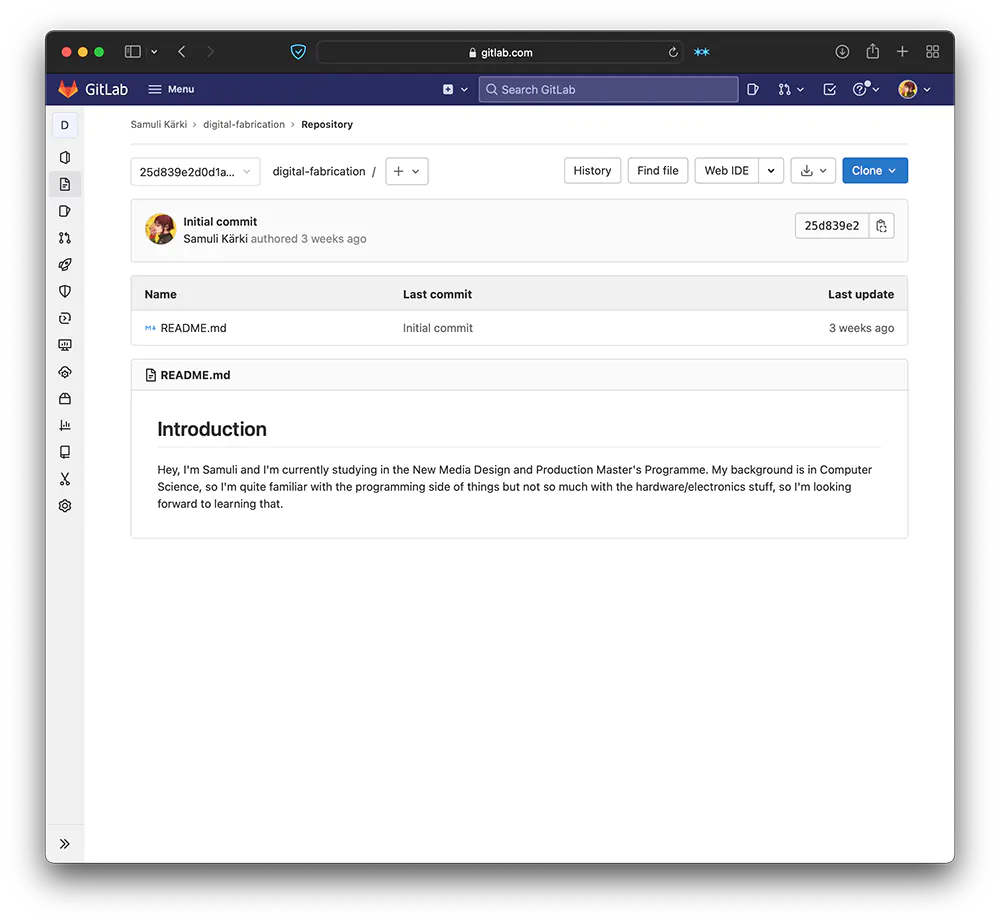
Your repo should now be created, and you should be greeted with a view of your repository.
At this point it's also a good idea to create an SSH key that GitLab can identify you with. This means that you don't have to enter your GitLab username and password each time you try to push changes to the remote, which can quickly become quite tedious.
To do this, we first need to generate an SSH key on our machine. Open the terminal and run the following command:
$ ssh-keygen -t ed25519 -C "your_gitlab_email_here"
Please note that the $ is not a part of the command, but there just to denote which lines are meant to be typed in the terminal
ssh-keygen will prompt for a passphrase, I used one generated by my password manager. Please use something secure.
After this, the SSH keypair is now generated. Now we need to copy the public key that GitLab can use to our clipboard. To do this easily, run:
$ tr -d '\n' < ~/.ssh/id_ed25519.pub | pbcopy
Now head on over to Edit profile > SSH Keys. You should be greeted with the following view:
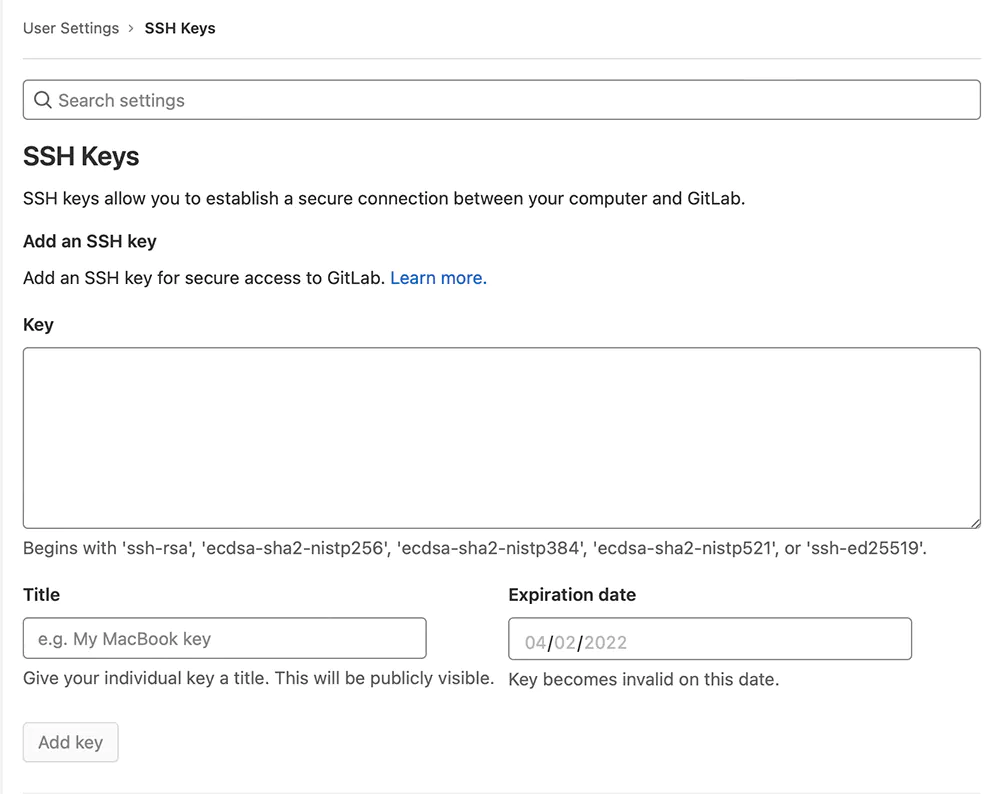
Here we can paste in your SSH key we copied to your clipboard in the previous step. Be sure to add a descriptive name, especially if you are accessing Git on multiple machines. I usually name them after the device the key is for, i.e. "Macbook Pro"
Press "Add key" and you should be good to go!
To finish setting up the SSH key, we also need to the key we just generated to the ssh-agent running on your machine:
# start the ssh-agent in the background
$ eval "$(ssh-agent -s)"
$ ssh-add ~/.ssh/id_ed25519
Most of the GitLab and Git setup is now out of the way, we just need one more step to configure Git on our local machine. To do this, open a terminal, and type in the following commands:
$ git config --global user.name "Your Name"
$ git config --global user.email "your_gitlab_email"
This makes sure that GitLab can properly attribute commits to our GitLab user in the remote repository that we created earlier.
Now we can clone our repository by opening the terminal and typing:
$ git clone git@gitlab.com:<your_gitlab_username_here>/<your_repository_name_here>.git
$ cd <your_repository_name_here>
Now if you run ls -a, you should get output that looks something like the following:
$ ls -a
.  ..  .git  .gitlab-ci.yml  README.md
Static Site Generation
To create our websites, we were instructed to use a static site generator, and deploy it to GitLab pages.
At first, I went with 11ty, as I'm quite familiar with JavaScript (and hate it with a passion. Talk about a Stockholm syndrome) and I've dabbled with it a before, so getting it set up would be a breeze. Right?
11ty
To get started, I needed node. To do this, I headed over to nodejs.org and downloaded the LTS version for macOS.
After installing, I reopened my terminal and checked that the installation was succesful with
$ node --version
v16.13.2
After installing node, I headed over to the digital-fabrication repository I had just cloned on my machine, and ran the commands they detail under their Quick Start -section on their front page:
$ npm install -g @11ty/eleventy
$ echo '# Page header' > README.md
$ eleventy
After this I ran eleventy --serve and headed over to http://localhost:8080/README/. I was greeted with the following view:
KUVA TÄHÄN
Wowzers, I had my own website! After this I dived deep into the docs to create my own templates (all the tutorials use Nunjucks, so this is what I ended up going with) and enabling file passthrough to serve static files alongside with my website.
Getting rid of 11ty
During one lecture, Kris mentioned that he doesn't really like 11ty and other similar static site generators due to the amount of dependencies they have, and I must say I agree. Kris even mentioned an alternative to Hugo with minimal dependecies called Zola.
I had to think about the switch for a while, but if I could choose between having a single minimal binary and a huge javascript blob, the choice was simple. Even the only bonus with 11ty, which was that I was familiar with JavaScript, didn't seem to matter much, as I was mainly writing Markdown and HTML with the exception of the configuration file, so I ended up switching to Zola.
Zola
To install zola, I used Homebrew, as I'm on mac:
$ brew install zola
After this I initialized my site by navigating into the git repository I cloned earlier and using the following command:
$ zola init --force
This will initialize zola in the folder you are currently in (i.e. the git repository). The --force option is required, as by default Zola doesn't allow initialization in a non-empty folder.
The installation prompted me the following:
> What is the URL of your site? (https://example.com): https://ambivalent.world
> Do you want to enable Sass compilation? [Y/n]: Y
> Do you want to enable syntax highlighting? [y/N]: N (at this time I didn't know I'd be adding code snippets to the site)
> Do you want to build a search index of the content? [y/N]: N
After this the default directory listing looked like the following:
$ ls -a
.   .git     sass    templates  .gitlab-ci.yml  config.toml
..  content  static  themes     README.md
Using Zola
For the sake of brevity, I won't detail too much of the differences between 11ty and Zola, but will instead focus on Zola, and how static site generators work in general.
The idea behind static site generators is that you write content in Markdown (.md-files), which then gets combined with templates and converted into HTML.
Templates specify how your content gets laid out. Templates in Zola live under the folder templates. Here's the template of my website (templates/index.html) as an example:
{% block content %}
<!DOCTYPE html>
<html lang="en">
  <head>
   <meta charset="utf-8">
   <link rel="stylesheet" href="/main.css">
   <title>{{ section.title | safe }}</title>
  </head>
  <body>
    <header>
      <a class="title" href="/">Samuli Kärki</a>
      <nav>
        <ul>
          <li><a href="/assignments">Assignments</a></li>
          <li><a href="/final-project">Final Project</a></li>
          <li><a href="/reading-list">Reading List</a></li>
        </ul>
      </nav>
    </header>
   <main>
     {{ section.content | safe }}
   </main>
  </body>
</html>
{% endblock %}
You can see here that the actual written content of the Markdown file (section.content) together with a title (section.title) defined in the metadata or "front matter" of the Markdown file. Markdown content in Zola lives under the folder, you guessed it, content. Here's an example of a file (content/assignments/_index.md) that uses the template above:
+++
title = "Assignments"
template = "index.html"
+++

# Assignments

- [Assignment 03: Project Management](/project-management)
Here you can see the front matter, which is denoted by wrapping in it two lines consisting of +++. In the front matter we define what the title of the page is going to be, and what template we are going to use. Here the title, in this case "Assignments", gets passed to section.title in the template.
After the front matter comes the actual content, which gets passed to section.content in the template. Markdown lets you format content in different ways. Here the content consists of a header titled "Assignments", followed by a list with one entry, which is a link to this page you're currently reading. More on Markdown formatting here.
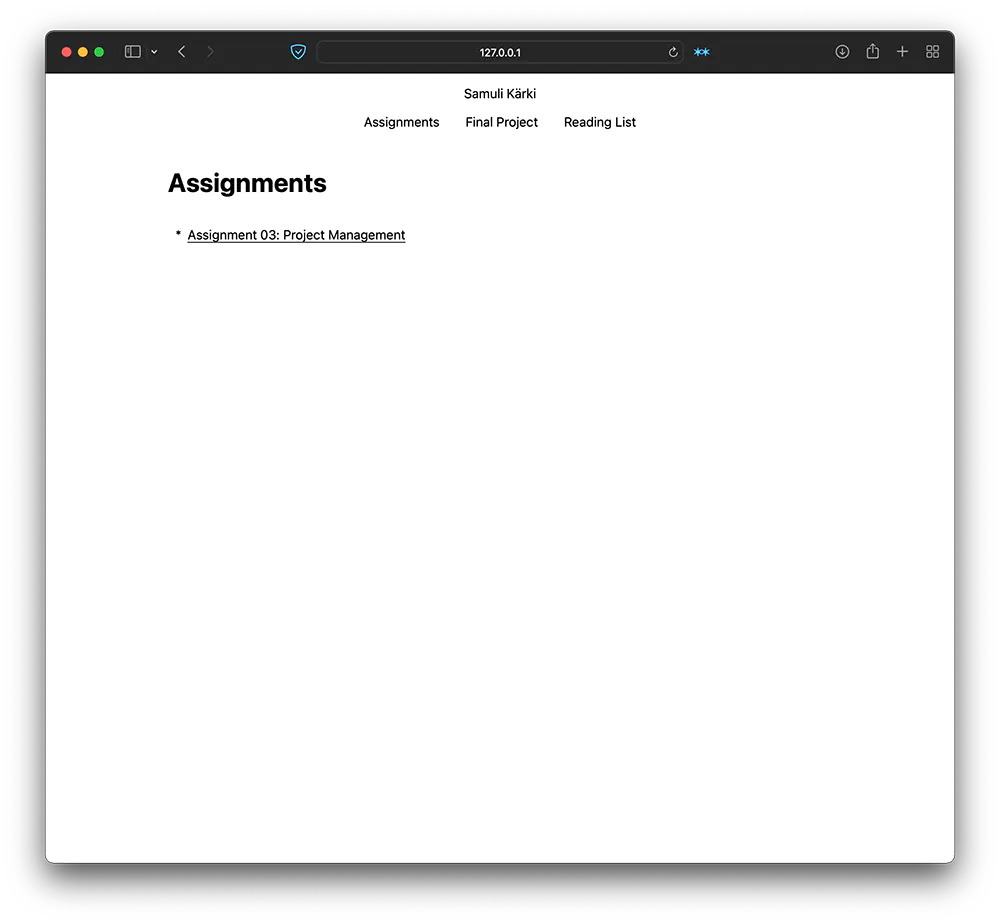
When rendered, that is the Markdown content gets combined with the template into a .html file, the result looks like this:
Routing
The way routing works in Zola is that each subfolder in the content folder generates a new route. As an example, the following directory structure:
├── content
│   └── blog
│   │   └── _index.md
│   ├── _index.md
would generate the following routes (with the base url of the site being localhost:8080):
localhost:8080/
localhost:8080/blog
_index.md files in Zola are called "sections". There is also support for "pages", where you have multiple files in a single content folder, but I've yet to use this feature, so I can't say much about it.
As of 9th February 2022, I've now moved the "Assignments" part of my page to use pages. This means that my assignments folder looks like the following:
content/assignments
├── _index.md
├── computer-aided-design.md
└── project-management.md
To get this working properly, the section (_index.md) front matter needed some changing:
+++
title = "Assignments"
template = "assignments.html"
page_template = "assignment-page.html"
+++
Here the page_template defines what template to use for each file in the assignments folder that is not named _index.md, i.e. is a page and not a section. A separate template is needed for the pages, not only because pages use different template variables, but also because I wanted a Table of Contents on the assignments page, but not on other pages. The assignment-page.html template looks like the following:
{% extends "base.html" %}

{% block content %}
<h1 class="title">
    {{ page.title }}
</h1>
{% if page.toc %}
    <ul>
    {% for h1 in page.toc %}
        <li>
            <a href="{{ h1.permalink | safe }}">{{ h1.title }}</a>
            {% if h1.children %}
                <ul>
                    {% for h2 in h1.children %}
                        <li>
                            <a href="{{ h2.permalink | safe }}">{{ h2.title }}</a>
                            {% if h2.children %}
                                <ul>
                                    {% for h3 in h2.children %}
                                        <li>
                                            <a href="{{ h3.permalink | safe }}">{{ h3.title }}</a>
                                        </li>
                                    {% endfor %}
                                </ul>
                            {% endif %}
                        </li>
                    {% endfor %}
                </ul>
            {% endif %}
        </li>
    {% endfor %}
    </ul>
{% endif %}
{{ page.content | safe }}
{% endblock content %}
Before, I only had a single index.html template, but now I've moved the top-level HTML to it's own base.html template, and now index.html handles displaying content on all section pages.
For the "Assignment" section, I needed to extend index.html so that it would list all the pages in the assignments section. The template was looks like this:
{% extends "index.html" %}

{% block content %}
    <h1 class="title">
        {{ section.title }}
    </h1>
    <ul>
        {% for page in section.pages %}
            <li><a href="{{ page.permalink | safe }}">{{ page.title }}</a></li>
        {% endfor %}
    </ul>
{% endblock content %}
In addition I needed to change the base.html template so that it would also display page titles:
<title>
    {% if section.title %}
      {{ section.title }}
    {% endif %}
    {% if page.title %}
      {{ page.title }}
    {% endif %}
</title>
Overall the transition to pages was pretty painless, and it made organization easier. Now I don't have to manually maintain the list of assignments, and I can also modify the assignment themselves to look different if needed, now that they have a separate template.
Styling
Styling websites is traditionally done with CSS, but Zola has support for SASS. SASS extends CSS with some useful features, more on which below. SASS files in Zola live under the folder sass, unsurprisingly. When you build your website, the SASS files get compiled into standard CSS: main.scss becomes main.css and so on.
Includes
SASS enables us to import other SASS files. This is especially useful for organization. In Zola (and I think in SASS general), files that are meant to be included with others are prefixed with a _. For example, I have all my variables in a file called _variables.scss, which then gets imported in my main.scss like so:
@import '_variables';
Now all the variables I've defined in _variables.scss are now accessible in main.scss as well.
In Zola, SASS files prefixed with a underscore don't get put into the public folder upon building the website.
Variables
Variables provide a useful way of making CSS a bit more easier to write and read. They're especially useful for color data. For example, my _variables.scss has the following line:
$background-color: #fff;
Which I then use in main.scss like so:
background: $background-color;
This means that if I choose to change my background color one day, I only have to change the one line in _variables.scss, instead of going through my main.scss and changing every line where I use white as the background color.
Code organization
SASS also allows us to organize CSS blocks more clearly. While I could normally write
body {
    background: $background-color;
    max-width: 73%;
}

body a {
    border-bottom: 1px solid black;
    color: black;
    text-decoration: none;
}

body a:hover {
        border-bottom: 0;
}
to scope these blocks to only affect the body of my website, it gets old pretty fast. SASS allows us to write
body {
    background: $background-color;
    max-width: 73%;

    a {
        border-bottom: 1px solid black;
        color: black;
        text-decoration: none;
    }

    a:hover {
        border-bottom: 0;
    }
}
which is a lot less tedious to write, and also is easier to read due to the indentation providing clearer context for which parts of the site which CSS blocks affect.
Serving files
In Zola, files are served from the static folder. No configuration is needed for this. Organization inside the static folder is free, for example I have the following structure:
static/
├── files
│   └── building_a_diy_transmitter.pdf
└── img
    ├── anime-book.gif
    ├── final-project.gif
    ├── new_project.webp
    ├── on_distance.MOV
    ├── on_distance.jpg
    ├── pipelines.webp
    ├── project_form.webp
    ├── project_overview.webp
    ├── rendered_webpage.webp
    ├── selfie.gif
    ├── ssh_keys.webp
    ├── ssh_keys_initial.webp
    └── ssh_keys_small.webp
All these files then get copied into the public folder upon building your Zola website, and can be accessed the same way you would access them during development. For example, the url for my glorious selfie is simply /img/selfie.gif, no need to add the static.
Media optimization
For image optimization, I resized most images to 1000 pixels wide, which seemed large enough for most images on this site. Images with smaller widths I kept as is. Here you can see the disk usage of my different visual media files:
du -h static/img/*
1.3M    static/img/anime-book.gif
8.0K    static/img/final-project.gif
20K     static/img/new_project.webp
2.2M    static/img/on_distance.MOV
2.0M    static/img/on_distance.jpg
12K     static/img/pipelines.webp
88K     static/img/project_form.webp
36K     static/img/project_overview.webp
20K     static/img/rendered_webpage.webp
12K     static/img/selfie.gif
44K     static/img/ssh_keys.webp
28K     static/img/ssh_keys_initial.webp
20K     static/img/ssh_keys_small.webp
All the GIF files are dithered and only use two colors, black and white. IMO, this gives a nice stylized effect, while still being mostly readable. I wouldn't use it on images that require a lot of fine details to be visible, but it works fine in this case.
For images that do require a lot of fine details, I ended up going with WebP. I have mixed feelings about this format: it's supported by most modern browsers, yet most if not all operating systems seem incapable of displaying them, and instead open the browser when you want to view them. And it's made by Google, and we all know what we think about Google.
But it compressed really well, as you can see. Google provides the cwebp tool for converting images to WebP, but I instead opted to use the Photoshop plugin WebPShop, so that I could have the conversion as part of my resize workflow, which I also do in Photoshop. One could probably also just write a bash script that uses imagemagick and cwebp to do all the resizing but I'm too lazy to do that...
As for the biggest files in the static folder, anime-book.gif is an anime GIF (unsurprisingly), and I love them anime GIFs. I will probably try to compress it with ffmpeg soon, or give it the 2-color dither treatment to see what it looks like.
The other two, titled on_distance.jpg and on_distance.MOV are part of my Electronics for Artists -documentation. I initially just uploaded them to have the documentation submitted by the deadline, but now I'll have to tackle the compression as well. As for on_distance, I think I'll give it the WebP treatment, and for the movie, I'll either compress it using ffmpeg or convert it to WebM. I'll have to see which gives better results.
Update 9th Feb 2022: After encountering the need to batch resize and convert images to .webp (due to the large amounts of screenshot generated for the Week 04 assignment), I've been using the following script, copied from StackOverflow and modified to my own needs:
#!/bin/bash

for file in *.png ; do cwebp -q 90 -resize 1000 0 "$file" -o "${file%.png}.webp"; done
Serving our website
After handling all the boilerplate and getting Zola actually up and generating web pages, it was time to deploy it to GitLab Pages.
Before pushing to git, I felt like it was a good idea to create a .gitignore file to prevent unwanted files from being pushed into the remote. Mine looked like the following:
public
.DS_Store
To actually deploy to GitLab Pages, the .gitlab_ci file needed modifying. This is the file that tells the GitLab CI/CD (Continuous Integration/Continuous Deployment) pipeline what commands should be run at what stage. Luckily, the folks at Zola had already done most of the work for me by providing a readymade .gitlab_ci file. The only changes I did to this file were removing the submodule stuff, because I don't use themes, and changing the master branch to main instead:
image: alpine:latest

pages:
  script:
    # Install the zola package from the alpine community repositories
    - apk add --update-cache --repository http://dl-cdn.alpinelinux.org/alpine/edge/community/ zola
    # Execute zola build
    - zola build

  artifacts:
    paths:
      # Path of our artifacts
      - public

  # This config will only publish changes that are pushed on the master branch
  only:
    - main
After this we are ready to commit and push:
$ git add -A
$ git commit -m "Deploy to GitLab Pages"
$ git push
After this I headed to the GitLab CI Pipelines -section, where the initial run of the pipeline was failing. I was a bit perplexed, but turns out it was failing because I hadn't verified myself using a credit card. This is apparently a precaution taken by GitLab to prevent abuse of their free CI/CD runners.
After verifying myself, I re-ran the pipeline and was greeted with the following blissful view:
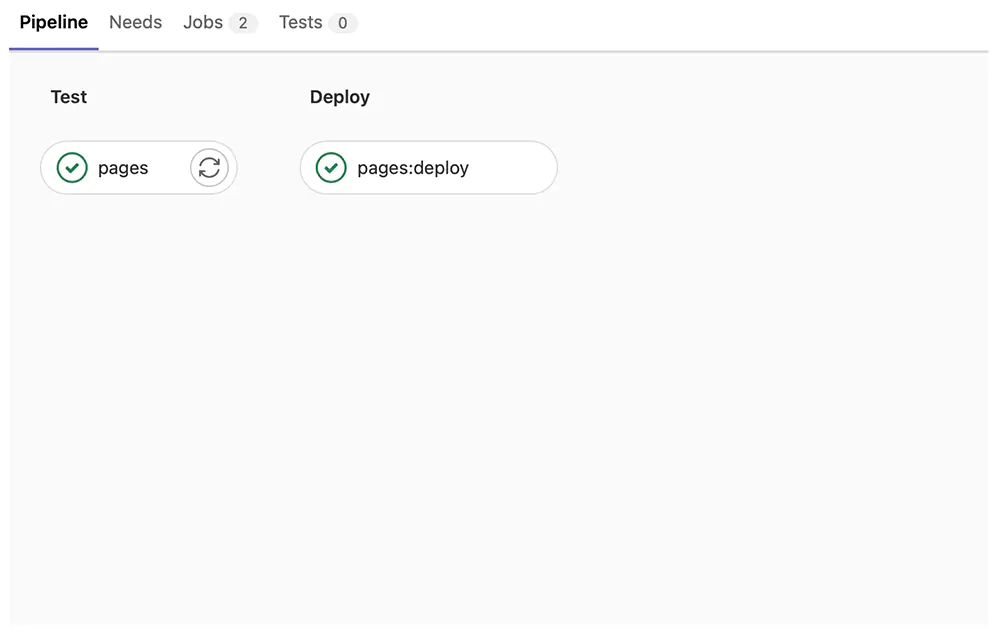
For a second I thought of adding a screenshot of my webpage here to show you that the deployment was succesful, but the fact that you are reading this is probably enough proof of that.